by Helen | Oct 20, 2026 | Spain, Travel
Beautifully restored architecture, peaceful courtyards and a little understated luxury in the heart of Marbella’s old town.
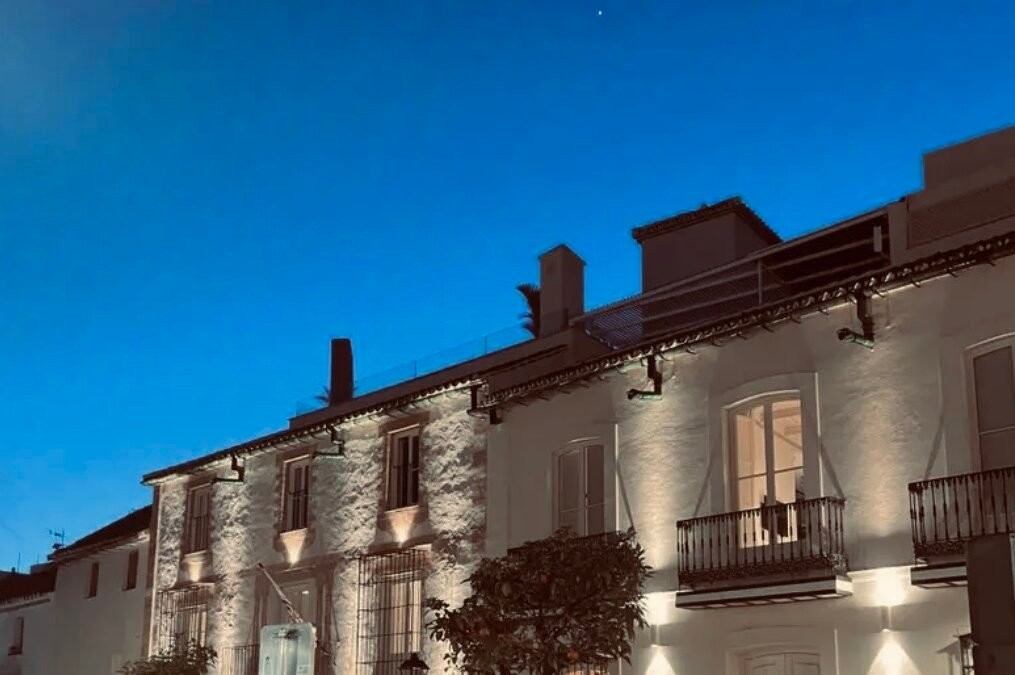
Marbella is a place that can conjure up all sorts of images, not all of them particularly appealing to us. But its old town is another story altogether. Whitewashed buildings, wrought-iron balconies, narrow streets, little squares and bougainvillea tumbling over walls. It’s a beautiful part of Andalucía, and tucked away on Plaza Santo Cristo is a hotel that we were very fortunate to experience.
La Fonda Heritage Hotel is, quite simply, one of the loveliest places we’ve stayed.
I should say from the outset that this isn’t a budget hotel. Far from it. Our stay was a very generous treat from friends who were visiting, and although we weren’t paying for the room ourselves, we certainly appreciated what a special experience it was. It’s somewhere I’d happily recommend for an occasion, a celebration or simply a few days of being thoroughly spoilt. As with many hotels in this part of Spain, staying outside the busiest season can make the price considerably more appealing.
a beautiful building with quite a history
One of the things that makes La Fonda so special is the building itself, or rather, the collection of historic buildings that make up the hotel. Its story stretches back centuries, with the site having served various purposes before becoming a hotel in the 1960s. It later gained a reputation as a fashionable Marbella meeting place, and its restaurant held a Michelin star from 1978 until 1995.
After years of neglect, the buildings underwent an extensive restoration, during which remarkable architectural features were uncovered and preserved. Ancient walls, arches, frescoes and courtyards have all become part of the hotel’s new life, alongside contemporary design and furnishings. It’s now part of Relais & Châteaux, a collection of distinctive hotels with an emphasis on character, hospitality and a genuine sense of place. Having stayed there, I can understand why.
first impressions
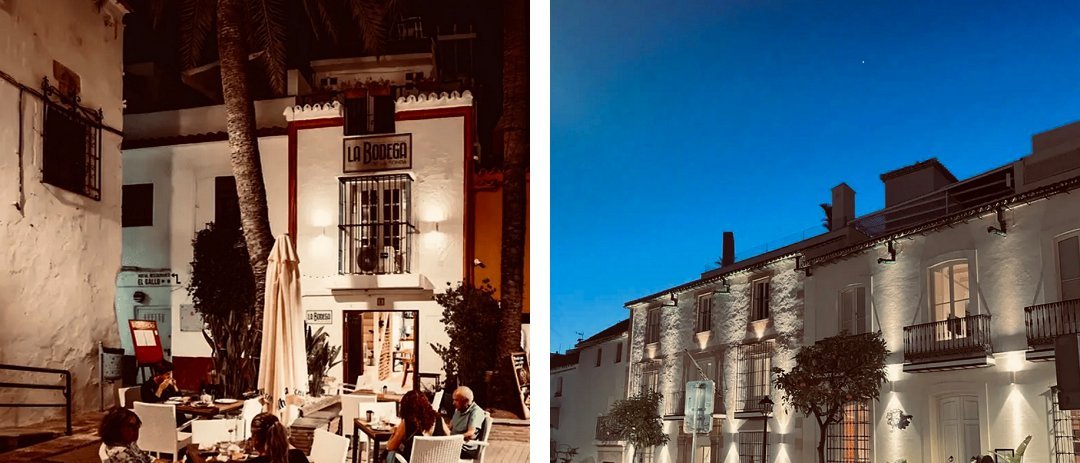
From the outside, La Fonda is everything I love about traditional Andalusian architecture. Whitewashed walls, dark wrought iron, substantial wooden doors and shutters, with beautiful greenery in large pots softening the whole building. We were renovating our own house at the time, so naturally I was taking mental notes before we’d even made it through the entrance.
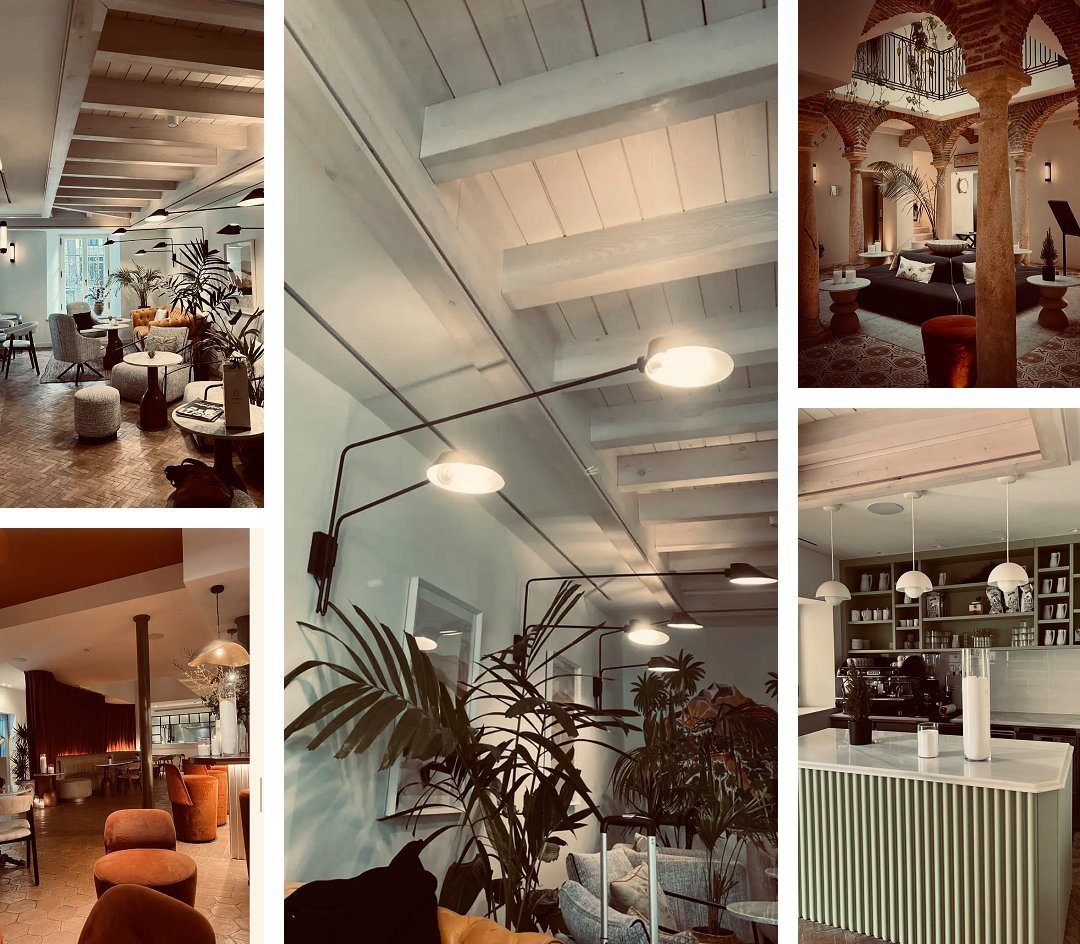
Inside, the attention to detail is wonderful. Rather than walking straight into a conventional hotel reception, you find yourself in a space that feels much more like an exceptionally beautiful home. Comfortable sofas, inviting chairs, carefully chosen furniture, objects, textures and soft lighting all contribute to a feeling of quiet elegance.
There are high ceilings, arches and ceramic tiled floors, with contemporary furnishings sitting comfortably alongside the building’s Moorish and Andalusian influences. Nothing feels overdone, and despite being right in the heart of Marbella’s old town, the atmosphere is wonderfully peaceful. It’s the sort of place where you immediately begin to relax.
courtyards, greenery and a room to remember
Our room overlooked the courtyard garden at the rear of the hotel, which was every bit as lovely as the interiors. There were different little areas for sitting, relaxing, eating or enjoying a drink, surrounded by generous planting and beautiful pots. And there was a lush green wall, which made us smile, as we’d had something similar at our house in Istria.

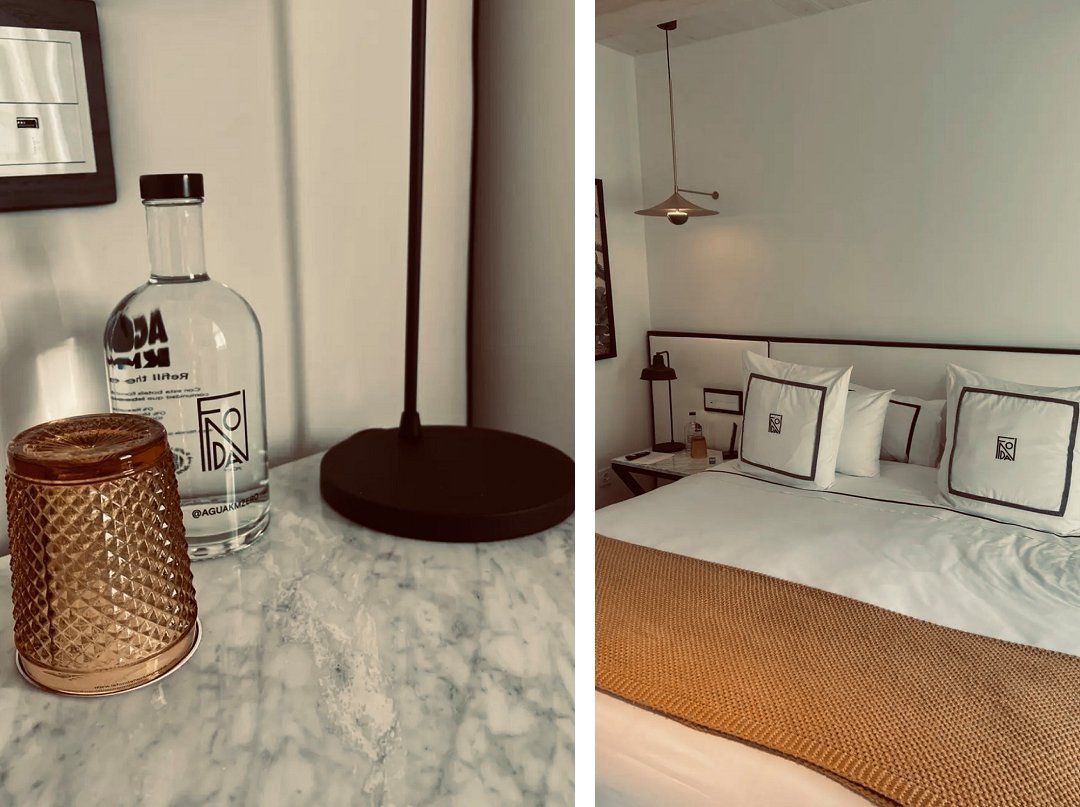
Inside, our room was just as carefully considered. A large, wonderfully comfortable bed, crisp white monogrammed linen and all those little details that make staying somewhere special feel like a genuine treat.
And then there was the bathroom. I’ve always loved white metro tiles, and this bathroom had them in abundance. We’d used them with black grout in our house in West Didsbury, much to the delight of our builder, and were considering something similar for our new home in Andalucía. The shower had black Crittall-style doors, another feature we’d already decided upon for our the ground floor of our house, so it was rather lovely to see the combination working so beautifully.
Pristine white sanitary ware, black accents, fluffy robes, slippers and gorgeous toiletries completed the picture. Everything felt luxurious without being ostentatious, which is quite a difficult balance to achieve.

breakfast, olive oil and a little more indulgence
Breakfast was à la carte and every bit as good as we’d hoped. Eggs cooked however you liked them, hams, cheeses, breads, preserves, juices and excellent coffee. Beautifully presented, delicious and served without any sense of hurry.
The hotel also sells its own olive oil, which was always going to be a temptation for me. I have a particular weakness for beautifully bottled olive oils, and this one came home with us. Happily, it tasted every bit as good as it looked.
As well as the hotel’s restaurant and rooftop bar, there’s La Bodega de la Fonda, a cosy restaurant just across the square. It’s a more informal option, serving Spanish favourites such as tortilla, croquettes, meatballs and Iberian ham, with the added pleasure of sitting in one of the prettiest little corners of the old town.
somewhere worth treating yourself to
What stayed with me most about La Fonda wasn’t any single feature, although there were plenty to admire. It was the feeling of the place. The restoration is beautiful, the interiors are thoughtful, the setting is wonderful and everything works together to create somewhere that feels genuinely special. There’s a sense of calm and comfort that you don’t always find, even in expensive hotels.
It’s certainly a treat rather than an everyday overnight stop, and I’d suggest looking at dates outside the main holiday season if you’re hoping to make it a little more affordable. But for a special occasion, or simply because you fancy staying somewhere rather lovely, La Fonda would be very high on my list.
And if, like me, you enjoy beautiful buildings, considered interiors and a hotel that feels connected to its surroundings, you may find yourself taking rather a lot of photographs. Possibly even of the bathroom tiles.
by Helen | Oct 20, 2026 | Lifestyle
There are certain things in life that ought to be simple. Turning on a light, for example. And yet, somehow, we managed to turn this most straightforward of activities into something of a technological endurance test.
When we were renovating the house, we bought some smart light bulbs for the bedrooms. The idea was appealing enough. Beautiful, warm lighting, adjustable to suit the time of day, and the possibility of having the lights come on automatically in the evening. All very clever. All very straightforward.
Or so we thought…
The bulbs were installed. The app was downloaded. Instructions were followed. Instructions were followed again. There was some discussion, a certain amount of sighing, and eventually a collective throwing up of hands. Pete has patience. I have considerably less. And so, for quite some time, our supposedly smart bulbs remained rather ordinary bulbs. They illuminated the bedrooms when we pressed the switches, and that was that.
Until this week…
For reasons I can’t entirely explain, we decided to revisit the whole business. The app in question was Tuya, and after a little account recovery, some experimentation and a considerably more successful attempt at connecting everything, we discovered something rather remarkable. The bulbs actually worked. Not only could we turn them on and off from our phones, but we could adjust their brightness and change the warmth of the light. And, most importantly, we could set a schedule.
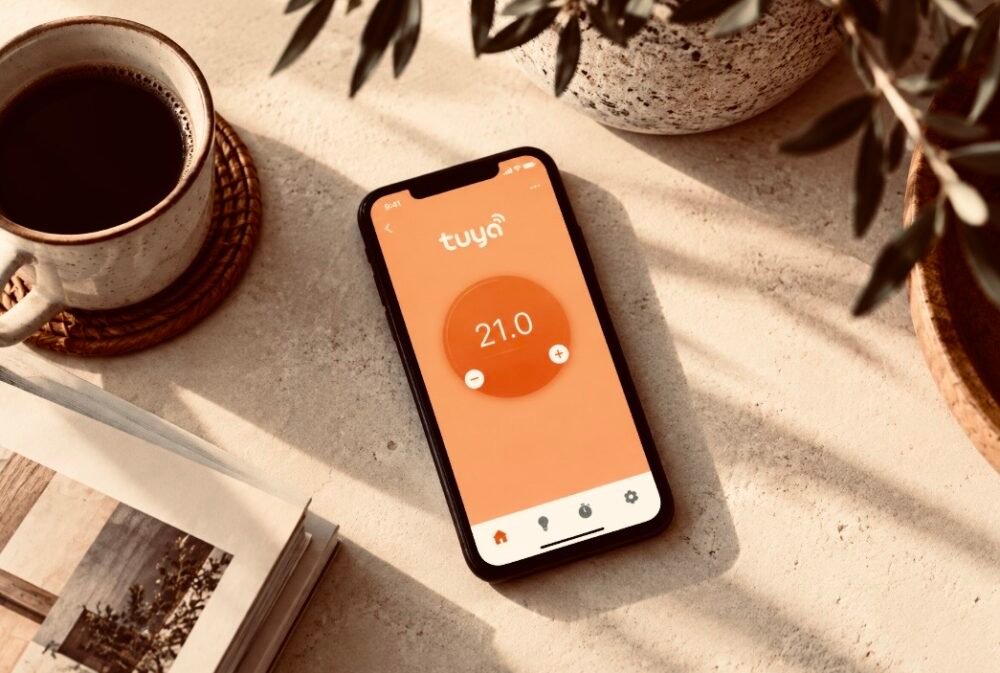
Every evening, at nine o’clock, the bedroom lights now will come on. At midnight, they will switch themselves off.
No intervention required. No wandering upstairs to switch things on. Just a little pool of warm light appearing exactly
when we’d asked it to. Of course, there is one small detail. The wall switches need to remain on. An entirely reasonable requirement, but one that will take a little getting used to when you’ve spent your entire life switching lights off as you leave a room.
And then came the moment of truth. We were supposed to check at nine o’clock that evening to see whether our carefully programmed schedule had worked. Naturally, we forgot. At twenty to ten, we suddenly remembered, went upstairs and found the bedrooms beautifully illuminated. They’d done it. All by themselves.
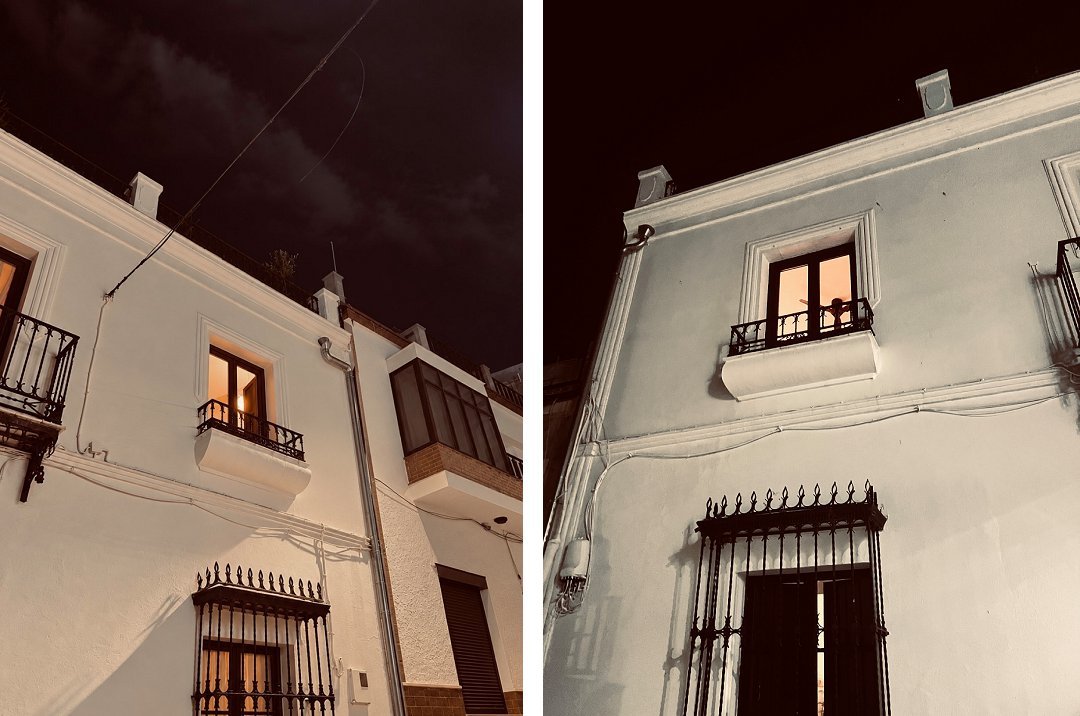
And the really lovely thing was that the lighting was exactly what we’d hoped for when we first bought the bulbs. Soft, warm and welcoming. The kind of light that makes a room feel particularly inviting on an autumn evening. And so, after months of neglect, our supposedly smart bulbs have finally earned their name. Every evening, at nine o’clock, the bedrooms will quietly illuminate themselves. At midnight, the lights will go out. Absolutely no intervention required.
A small thing, perhaps. But as the evenings grow darker and the house begins to settle into its autumn rhythms, it feels lovely. And now that we’ve discovered what a little technology can do, we’re beginning to wonder what else might be possible…
But that’s a story for another day.
by Helen | Oct 17, 2026 | France, Travel
An unexpectedly lovely hotel overlooking Place d’Assas, in a French city we knew very little about. If only we’d arrived a couple of days earlier…
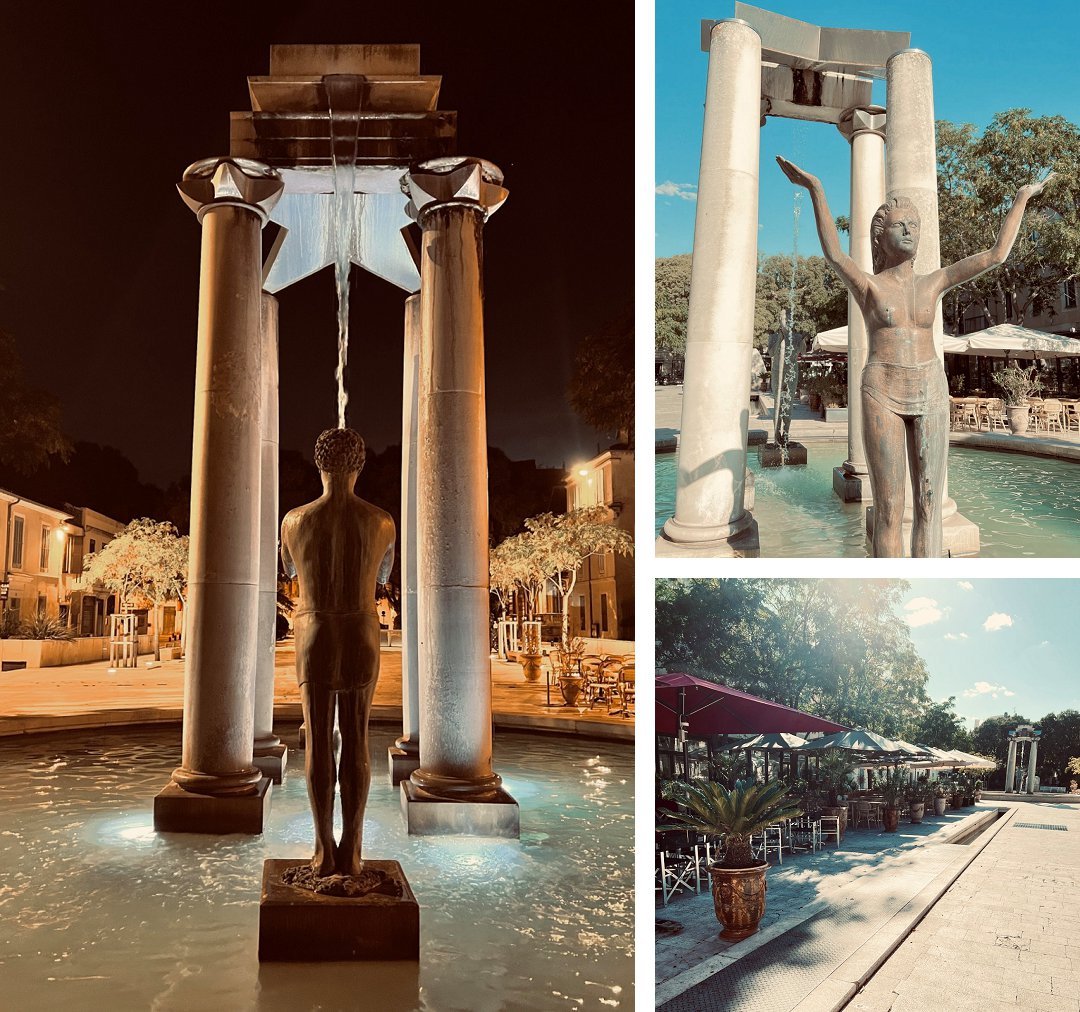
One of the loveliest things about our late summer road trip through France was discovering places we knew very little about. We’d visited Paris several times over the years, but beyond the capital, our knowledge of France was surprisingly limited. Nîmes was one of those places. We knew it had an impressive Roman history, with an extraordinary collection of ancient monuments, but that was about the extent of our knowledge. So, when we arrived on a Tuesday afternoon and discovered that our hotel overlooked a beautiful, tree-lined square surrounded by bars and restaurants, we were feeling rather pleased with ourselves. It looked as though we’d landed in exactly the right place. Unfortunately, our timing was spectacularly bad…
nîmes : a city recovering from a very big party
What we hadn’t realised was that we’d arrived immediately after an extended weekend of celebrations marking the inclusion of the Maison Carrée on the UNESCO World Heritage List. There had been music, street food, fireworks, parties and all manner of festivities. The whole city had apparently been celebrating, and by the time we arrived, everyone seemed to have decided that a couple of days’ rest was thoroughly deserved. Which meant that all those fabulous-looking bars and restaurants we’d been admiring were closed.
Everywhere. Well, almost everywhere.
We eventually found a lovely Italian restaurant, so dinner was rescued, and we managed to see some of the city’s remarkable Roman architecture. But it was rather amusing to discover that we’d arrived in Nîmes just as Nîmes had decided it needed a holiday. Fortunately, we’d booked a hotel that turned out to be something of a destination in its own right.
le royal hôtel : a little different from the ordinary
The Royal Hôtel occupies a former nineteenth-century cloister on the edge of Place d’Assas, just a short walk from the Maison Carrée. It’s a beautiful old building, full of character, and the renovation has been handled with a lovely balance of traditional features and contemporary design. There’s nothing particularly predictable about the interiors, which is exactly what appealed to us. The communal spaces have a slightly quirky, boutique feel, with interesting artwork, unexpected details and a sense that someone has actually thought about the atmosphere they wanted to create. It feels relaxed rather than formal, stylish without being precious, and quite different from the rather anonymous hotels that can make travelling feel a little interchangeable. We liked it immediately.
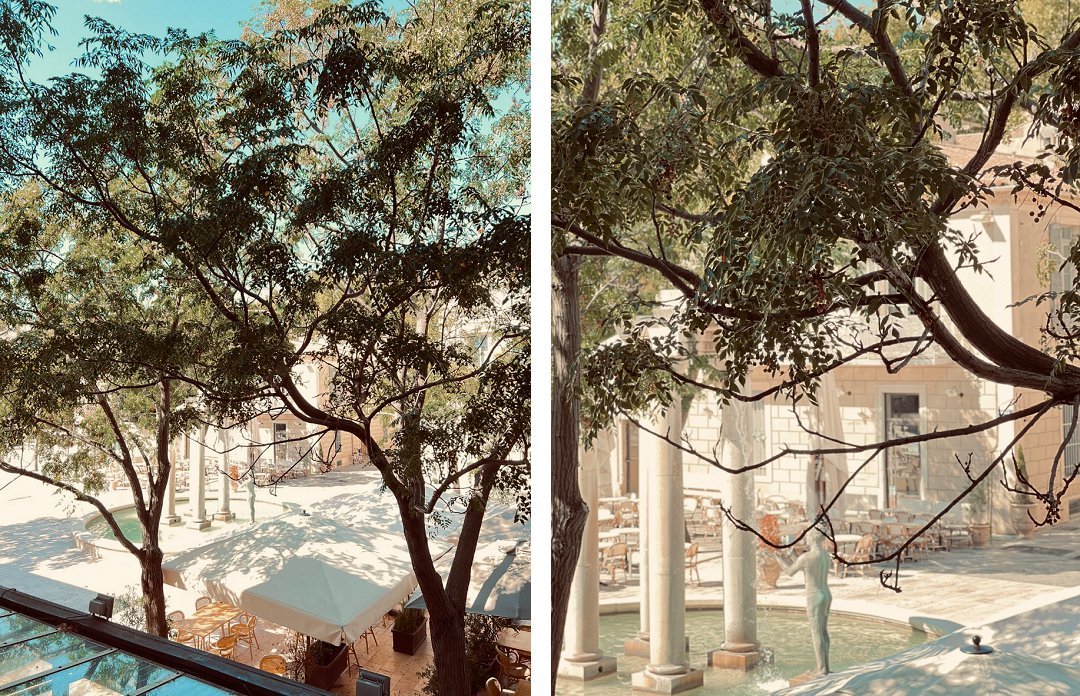
We’d booked a superior double room, and it was enormous. There was plenty of space to spread out, a very generous bathroom and an excellent walk-in shower, which is always appreciated after a day spent travelling. But the real delight was the view. Our room had huge shuttered windows overlooking Place d’Assas, a wonderfully elegant square filled with mature trees, fountains and sculptures. I have a particular affection for cities that value their trees, allowing them to grow and flourish rather than regarding them as something to be regularly chopped down or severely pruned. And this square was a beautiful example of just how much they contribute to a city. Looking out through those enormous windows, with the rooftops and architecture beyond, it was difficult not to feel rather delighted with our choice of hotel. Even if the restaurants below were resolutely refusing to open…
interesting interiors & a sense of humour
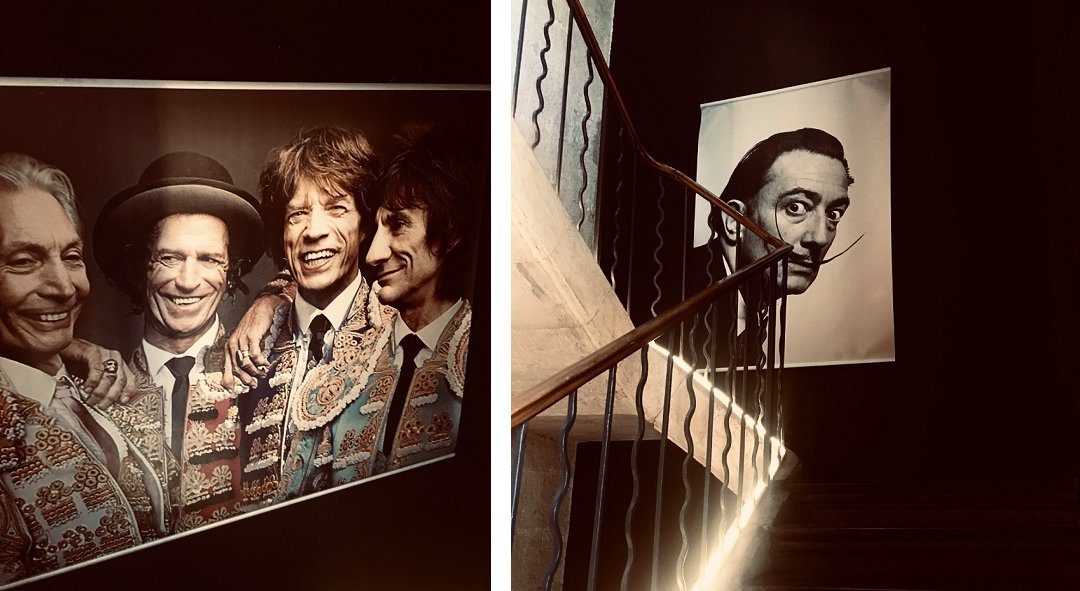
One of the things we particularly enjoyed about the Royal Hôtel was its artwork. The corridors and staircases were filled with playful, sometimes unexpected pieces, giving the hotel a personality of its own. There was a photograph of The Rolling Stones, suitably dressed as matadors, looking ready to visit the city bullring, alongside other artwork that gave the interiors a contemporary edge. It’s the kind of detail that can make an enormous difference to a hotel. Rather than simply providing somewhere to sleep, the building becomes part of the experience. And in a city with such an extraordinary architectural history, it felt particularly appropriate that an old building had been given a new lease of life without losing its character.
breakfast at the royal hôtel
Breakfast was included in our room rate and was served in a lovely dining room, which seemed to double as an informal working space. A couple of people were already settled at tables with their laptops when we arrived. Rather than a buffet, breakfast was presented individually on trays, with fresh croissants, bread, muesli, yoghurt, fruit, preserves and other little accompaniments. It was simple, beautifully presented and rather clever. The individually packaged items presumably helped avoid unnecessary waste, as anything unopened could potentially be used again. There was certainly more than enough food for us, and with plenty of coffee available, it was a very pleasant way to begin the day. Nothing overly elaborate, but thoughtfully done. Which, when I think about it, rather sums up the hotel itself.
exploring the roman city of nîmes
Although our timing meant that we didn’t experience Nîmes at its liveliest, we did manage to see some of the architecture for which the city is so well known.
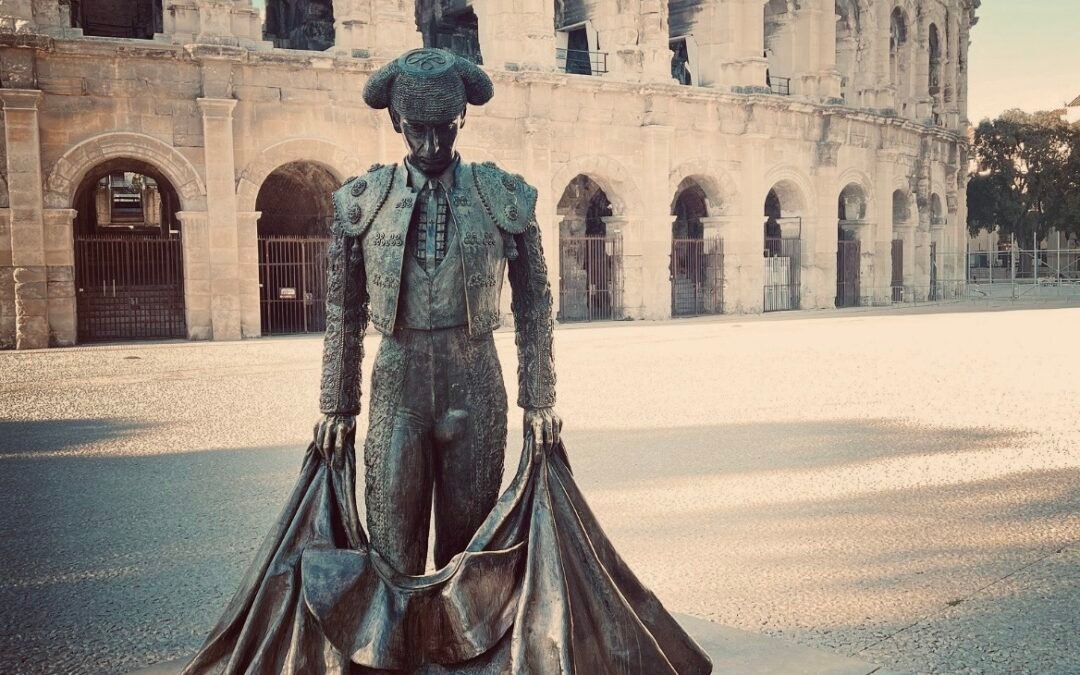
The Maison Carrée is an extraordinarily well-preserved Roman temple, built around two thousand years ago, and it’s quite something to encounter a building of that age in the middle of a modern French city. Then there’s the Arena of Nîmes, another remarkable survivor from the Roman period, which continues to be used for events and performances. Unfortunately, bullfighting is still among them, something I find particularly difficult to reconcile with the beauty and history of the building.
The Pont du Gard, the spectacular Roman aqueduct outside the city, is another of the region’s great historical landmarks, although we didn’t visit it on this occasion.
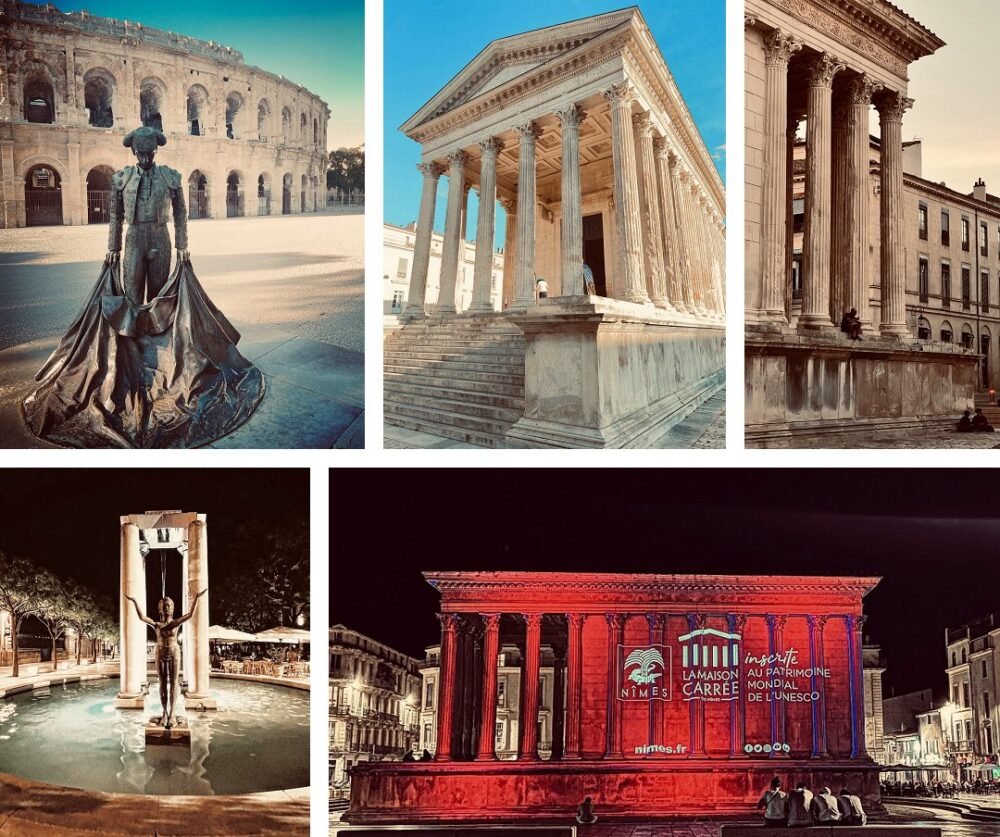
What struck us most was how much history is woven into the everyday fabric of Nîmes. These aren’t simply isolated monuments tucked away behind gates; they’re part of the city’s identity. And having arrived knowing relatively little about the place, we left wishing we’d had more time to explore. Preferably when everything was open.
A city worth returning to…
We found the Royal Hôtel to be excellent value for money, beautifully located and full of the kind of character we particularly appreciate. Our room was spacious and comfortable, the interiors were interesting without trying too hard, and the setting overlooking Place d’Assas was absolutely lovely. It was also an excellent base for exploring the historic centre, with some of the city’s most important Roman monuments within easy walking distance.
Of course, our experience dates from September 2023, so room rates, facilities and breakfast arrangements may have changed since our visit. But the things that made it memorable – the building, the location and the character of the interiors – are what I’d look for again.
As for Nîmes, I think we owe it another visit. We saw enough to know that it’s a beautiful city, but not quite enough to feel that we’d properly experienced it. Arriving immediately after one of its biggest celebrations was unfortunate, although it did give us a story to tell. And perhaps there’s something rather nice about leaving a place knowing that you’d happily return. Next time, though, I might check the local calendar before booking.

by Helen | Oct 16, 2026 | Italy, Spain, Travel
Driving through Liguria, an overnight stay in Genoa and a ferry crossing to Barcelona. The next stage of our journey from Istria to Andalucía turned out to be rather more memorable than we’d anticipated.
Our journey from Istria to Andalucía was turning into quite an adventure. After seven years living in Croatia, we were heading towards a new life in southern Spain, revisiting places we’d loved, discovering new ones and generally trying to make the most of what was a very big change in our lives.
We’d already driven through southern France and into Spain in September 2023, and although it’s a beautiful route, we fancied doing something different this time. So, rather than spending more days in the car, we decided to take the overnight ferry from Genoa to Barcelona. At just over €500, the crossing wasn’t cheap, but we reasoned that we’d save ourselves a considerable amount of driving, additional accommodation and general exhaustion. And the prospect of leaving the car behind for a few hours, enjoying a decent dinner and getting a good night’s sleep was enormously appealing. As it turned out, not everything went quite according to plan…
driving through liguria to genoa…
Leaving Bologna behind, we drove through the beautiful countryside of Emilia-Romagna before crossing into Liguria. The landscape was lush and green, dotted with little hilltop towns, almost always with a campanile rising above the rooftops. Even in early July, the roads were surprisingly quiet and on some stretches, we seemed to be the only car for miles.
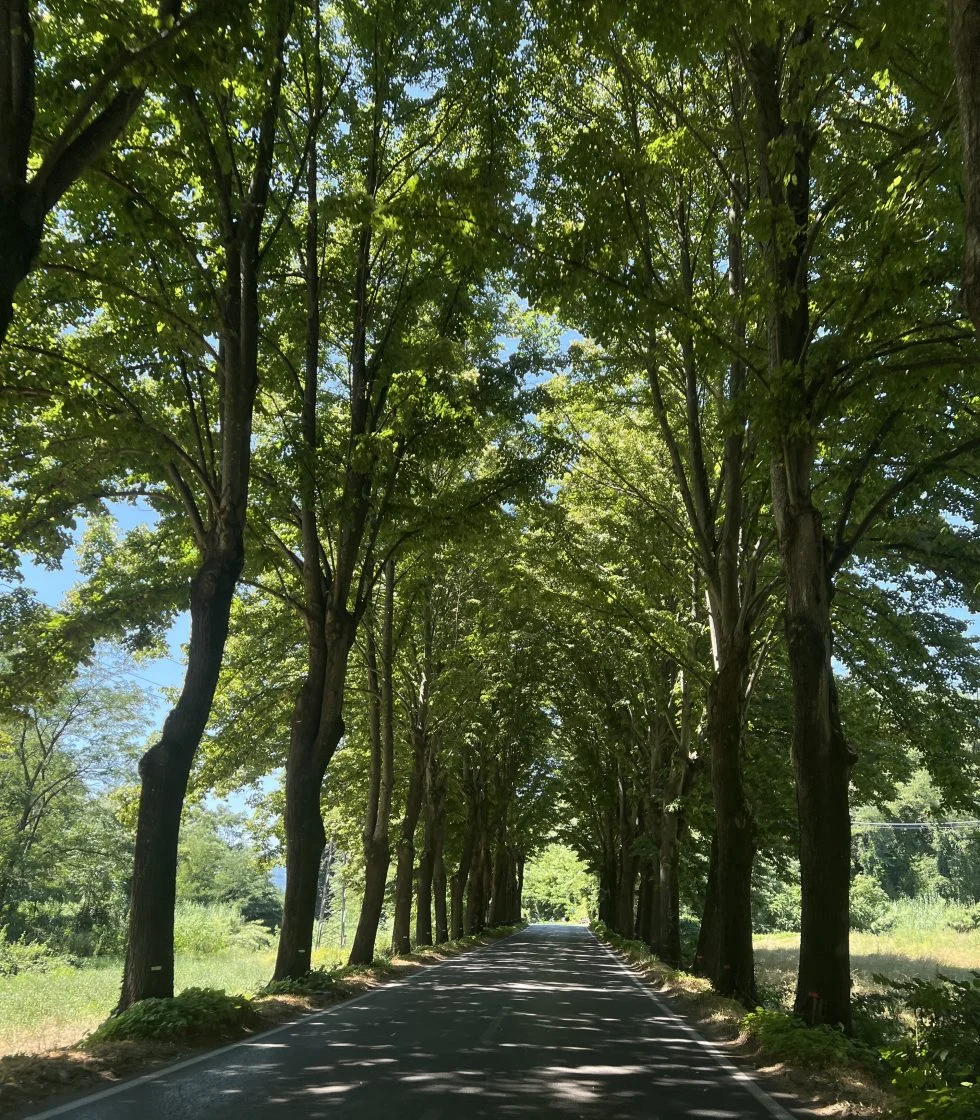
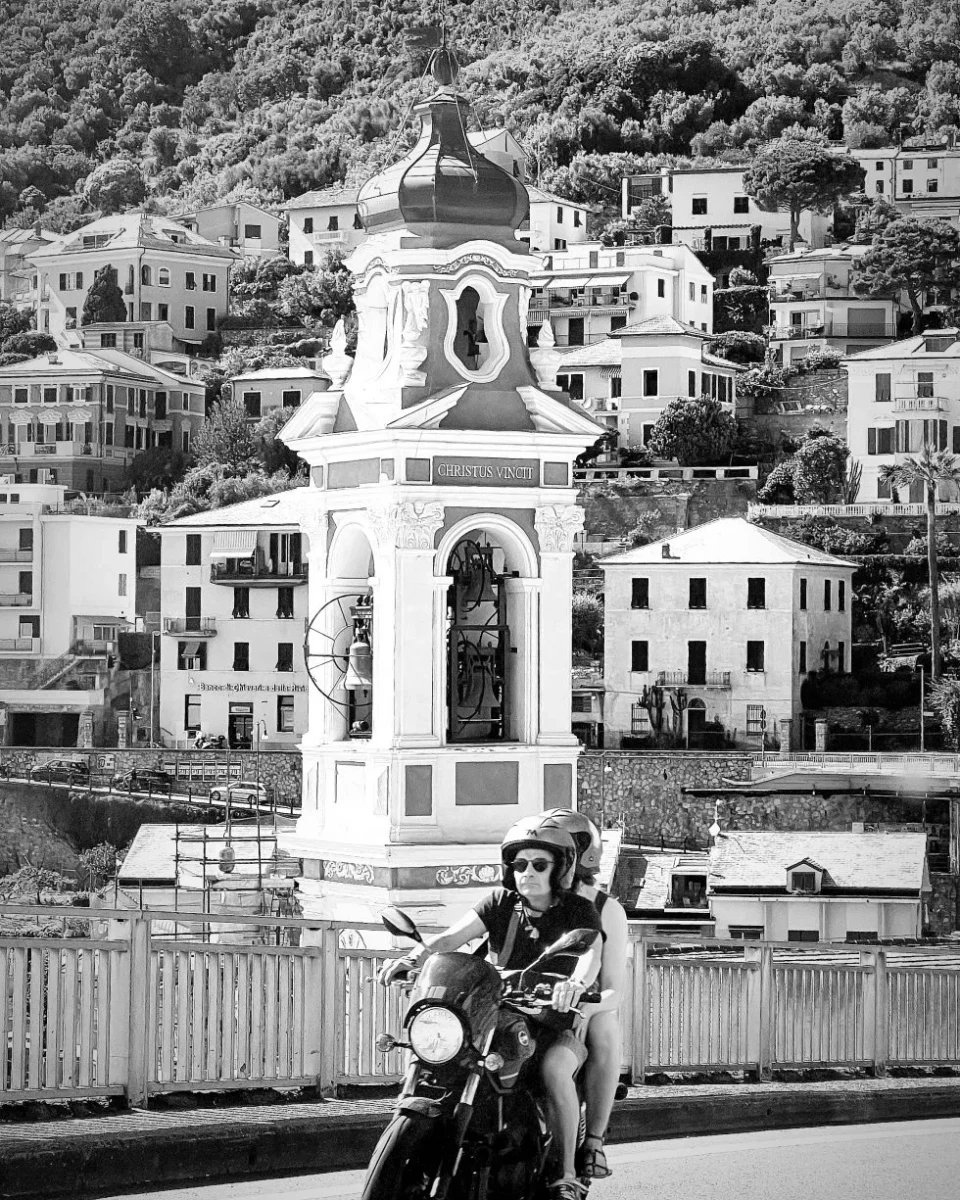
As we travelled further west, the scenery began to change quite dramatically. The softer countryside gave way to mountains, some of them scarred by enormous quarries, exposing great pale sections of rock. It was quite exhilarating driving through this landscape, with the mountains towering above us and the occasional glimpse of a little village clinging to the hillside. Eventually, we began descending towards the coast, curving around the bay at Camogli, somewhere we’d visited years earlier and remembered with enormous affection. And there were those beautiful pastel-coloured buildings, still lining the waterfront, looking every bit as lovely as we remembered.
It was a reminder of just how fortunate we’d been to have Italy practically on our doorstep for the previous seven years. Little did I know quite how much that thought would come back to me later in the day.
arriving in genoa: a little italian chaos
After years of relatively rural living, arriving in Genoa was quite an experience. It’s a huge, bustling port city and we managed to arrive right in the middle of rush hour, which ordinarily would have been enough to send us into a state of mild despair. But, strangely, we loved it. Scooters were whizzing past us, police cars and ambulances were screaming through the streets, traffic police were attempting to impose some kind of order and pedestrians seemed to regard moving vehicles as something of an inconvenience rather than an actual danger. All of this accompanied by the relentless July sun beating down on the city.
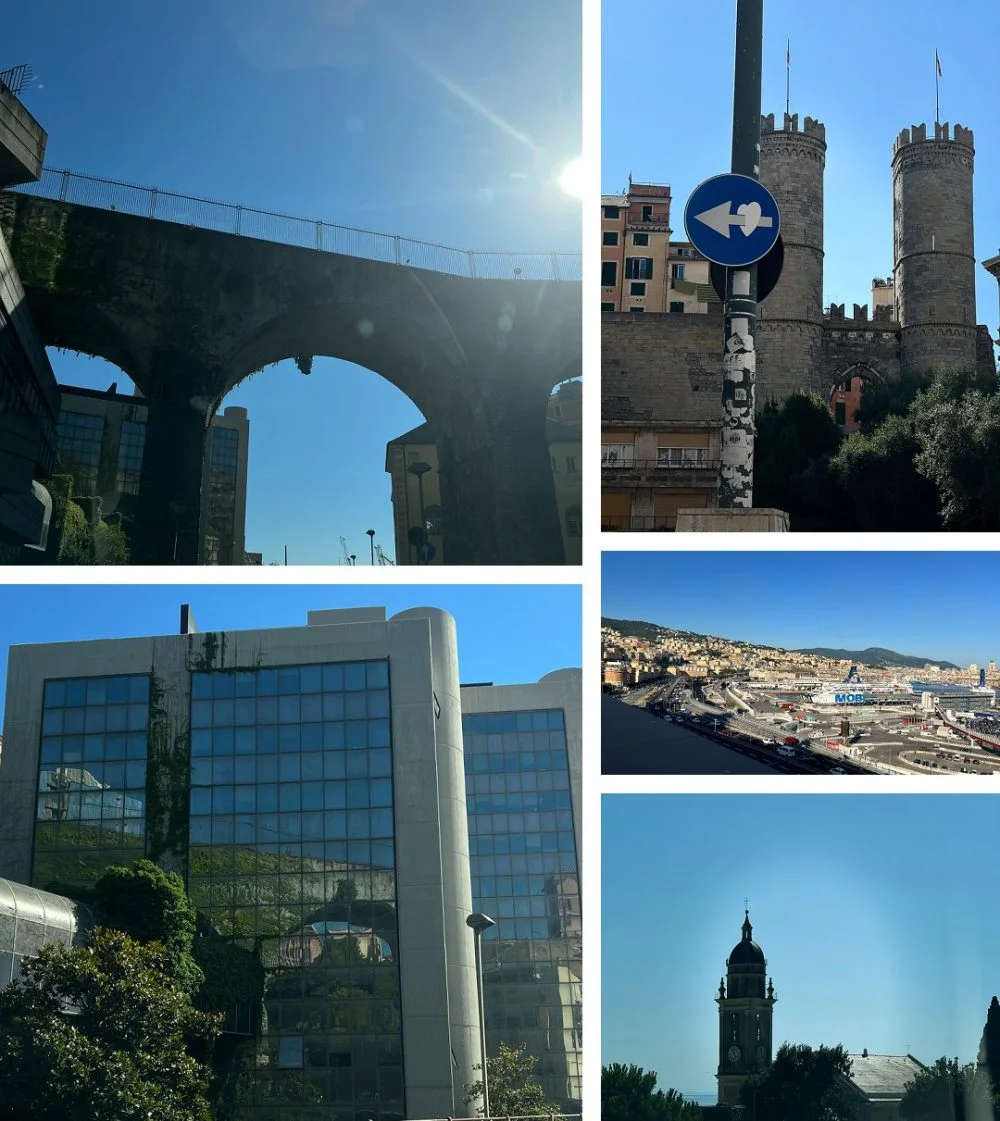
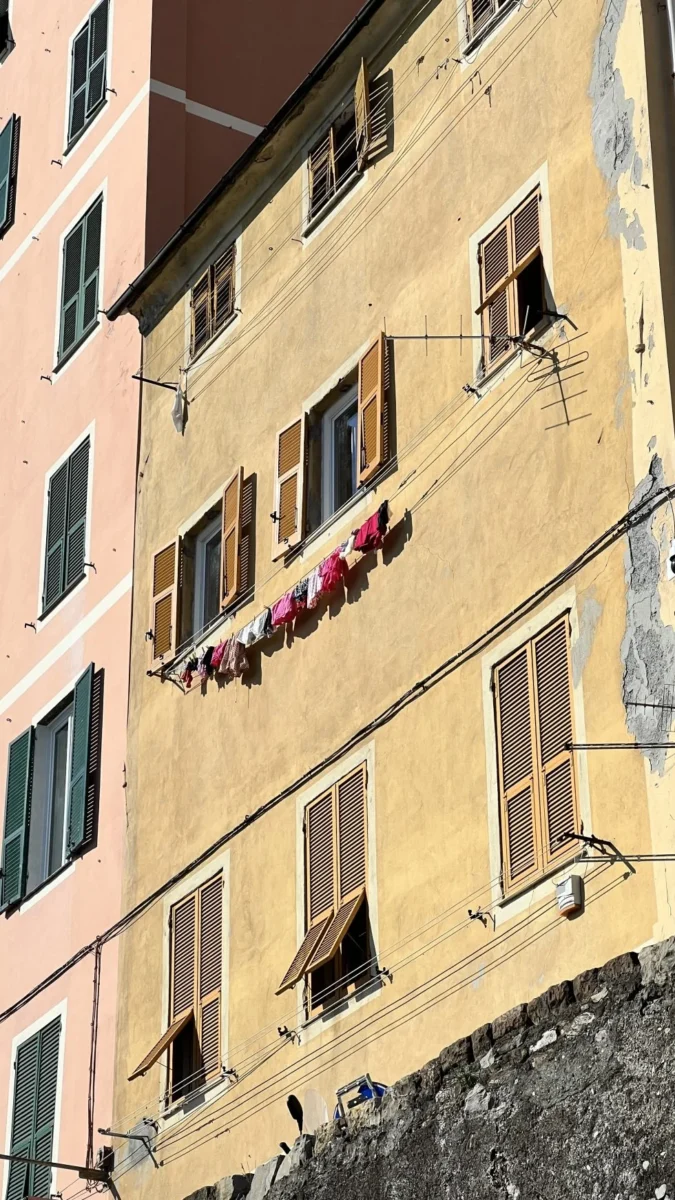
It was hot, noisy, chaotic and absolutely exhilarating. After the peace and quiet of Istria, there was something rather wonderful about being back in the middle of a big Italian city. Unfortunately, we weren’t in Genoa for a leisurely city break. We had a ferry to catch the following day, so our priorities were fairly straightforward – somewhere comfortable to sleep, somewhere safe to park and somewhere good to eat. Preferably without having to get back into the car.
an overnight stay near genoa’s port
We made a slightly unusual hotel choice for us and booked a Holiday Inn. Not normally somewhere we’d gravitate towards, but its proximity to the port, secure parking and restaurant made it seem the sensible option. We knew we’d be tired after the drive and didn’t particularly fancy navigating Genoa again in search of dinner. And what a good decision that turned out to be.
Our room was on a high floor, overlooking the city and port, with a cracking view of the sunset. The hotel itself wasn’t going to win any awards for its interior design, but everything was comfortable, straightforward and exactly what we needed. The restaurant, however, was something else entirely. We’ve come to expect excellent food in Italy, but even so, this surpassed our expectations. I can still remember my seasonal vegetable soup and the trofie al pesto, both absolutely gorgeous and accompanied by excellent local white wine. Sometimes the places you expect the least from turn out to be the most memorable.

After a very good night’s sleep, we were feeling rather pleased with ourselves and ready for the next part of the journey. Our ferry was scheduled to depart at noon, so we had plenty of time to get to the port, check in and settle ourselves on board. Or so we thought…
taking the car ferry from genoa to barcelona
We’d booked the crossing to Barcelona as an alternative to driving through France, but had we investigated a little more thoroughly, we’d have discovered that the ferry continued onwards to Tangier. Given that we were heading towards south-western Andalucía to look at houses, we could potentially have travelled further by sea and then crossed back to Spain, saving ourselves a considerable amount of driving. However, we’d already made our arrangements and, with hindsight, I’m rather glad we did. The journey south from Barcelona turned out to be another adventure, taking us through places we might otherwise never have discovered. Anyway, back to our scheduled noon departure. Which didn’t happen.
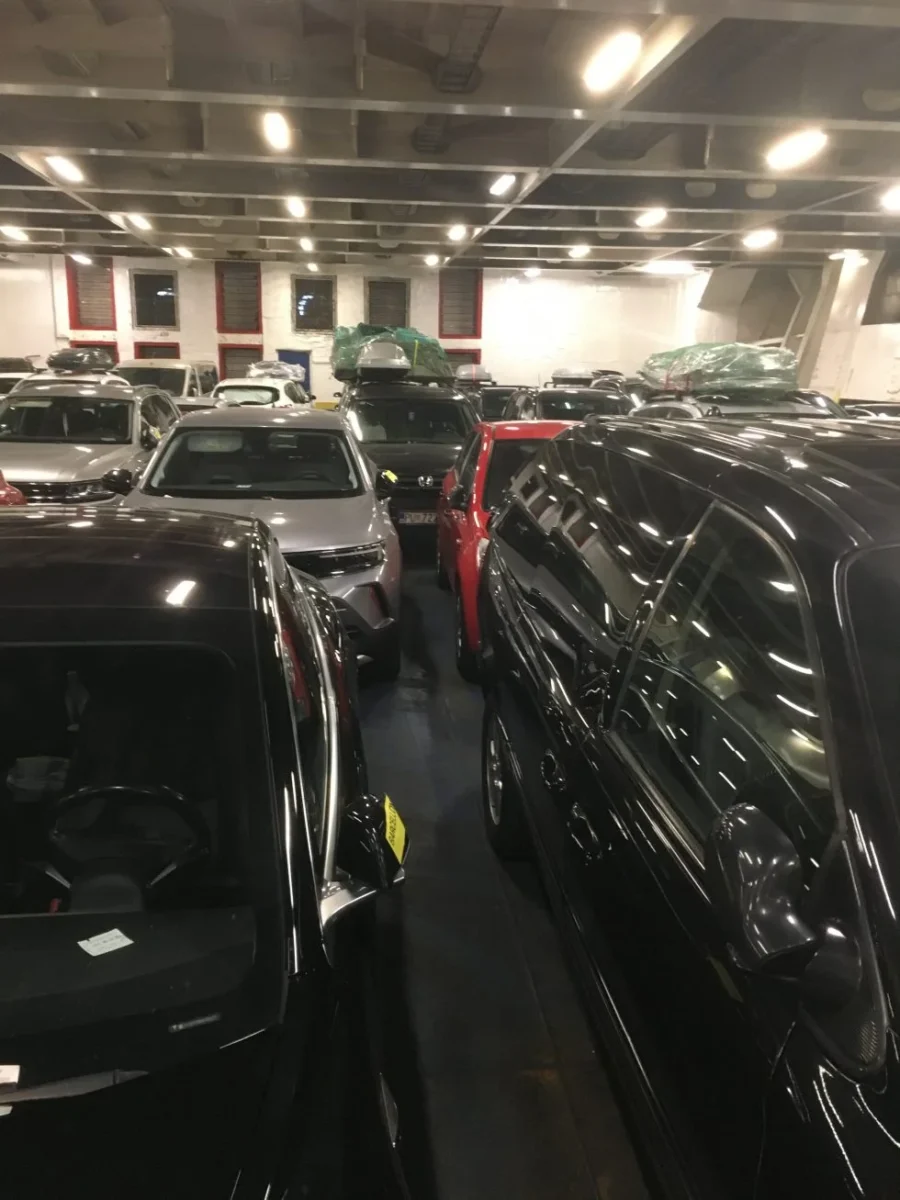
For reasons that were never particularly clear to us, the ferry was delayed by around four hours. Unfortunately, we’d already checked in and joined the queue of vehicles waiting to board, which meant spending an increasingly uncomfortable afternoon sitting in a sweltering car. In Genoa. In July. By the time boarding finally began, we were more than ready to get out of the car, although there was one final challenge to negotiate. Vehicles were directed into the depths of the ferry, where drivers had to drive forwards and then perform a very, very tight reversing manoeuvre to get the cars facing the opposite direction.
It was pretty chaotic down there and I was enormously relieved not to be the one behind the wheel. Once we’d finally parked, we grabbed our bags and headed upstairs, delighted to leave the car behind.
leaving italy behind
As we finally sailed out of the Bay of Genoa, I found myself feeling unexpectedly sad. Much more so, strangely, than when we’d actually left our home in Istria. I think the business of leaving Croatia had been so all-consuming that there hadn’t really been time to reflect on what we were leaving behind. There’d been packing, organising, goodbyes and the excitement of what lay ahead, but suddenly, watching the Italian coastline disappear, it all felt very real. For seven years, Italy had been such an easy part of our lives. We could cross the border almost on a whim, whether for a weekend away, a shopping trip or a few days exploring somewhere new. We’d become so accustomed to having it on our doorstep that I think we’d started to take it for granted. And now, sailing away from Genoa, I realised that I had absolutely no idea when we’d be back. It was a surprisingly emotional moment, and one that has stayed with me.
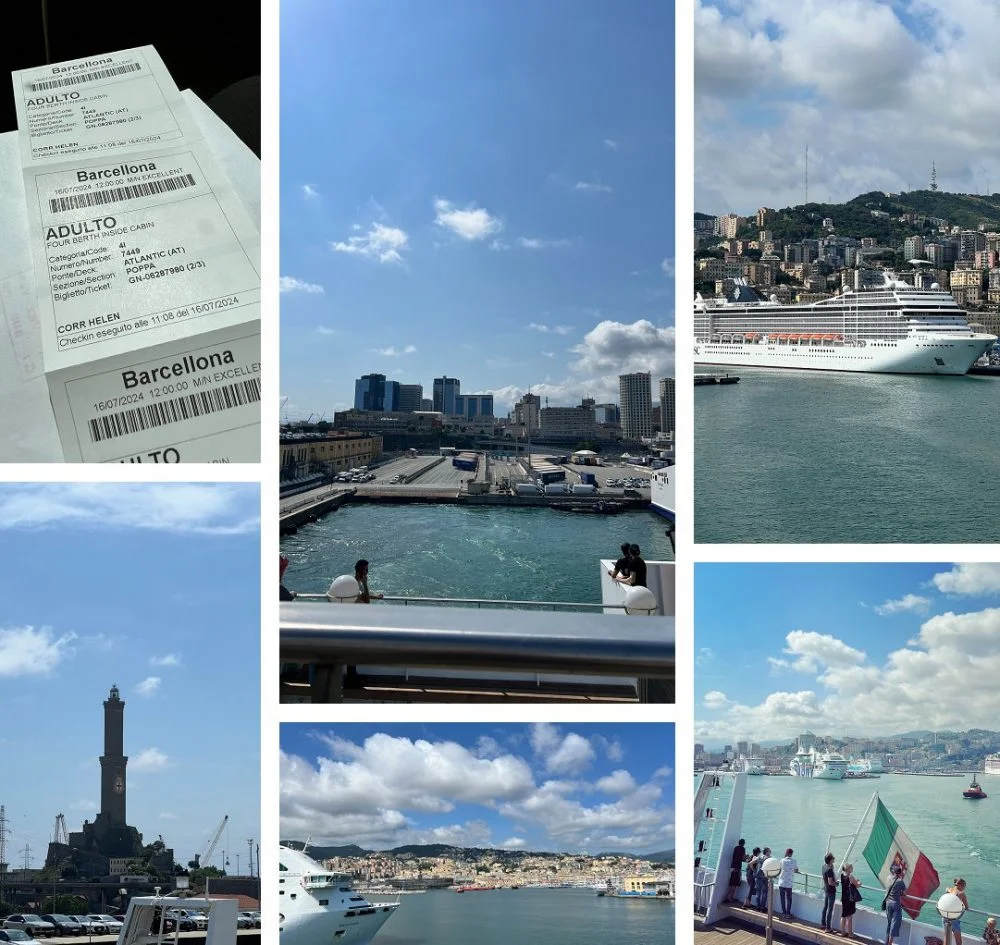

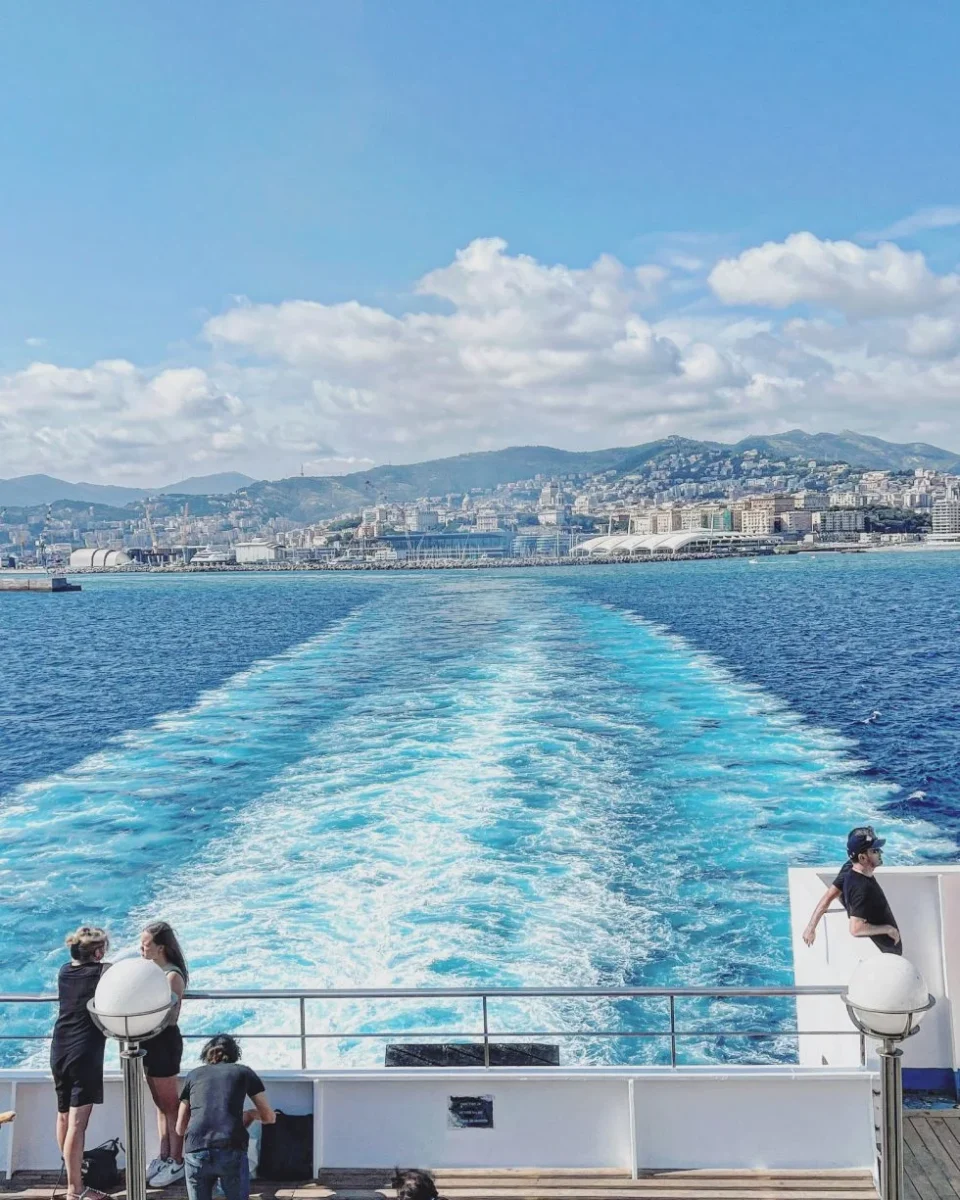
dolphins in the bay of genoa
And then, just as we were settling into the journey, Italy gave us a rather wonderful farewell present. Dolphins! Seven years in Istria and not a single dolphin sighting. Yet within half an hour of leaving Genoa, there were five or six of them, swimming and leaping through the water, following the wake of the ferry. We stood watching them appear and disappear among the waves, absolutely delighted. After the heat, the delays and the sadness of leaving Italy, it was a magical moment and one of the loveliest memories of the entire journey. Not a bad farewell, really.
life on board: our cabin, dinner & a night at sea
We’d booked an internal cabin designed for four people, although quite how four people would have managed comfortably in there is beyond me. It was small, boxy and rather claustrophobic, so we decided we’d spend as little time in it as possible. The upper deck was beautiful as we left port, but once the ferry gathered speed, the wind became fierce and sea spray was whipping around us. Eventually, we admitted defeat and retreated indoors, which conveniently coincided with the opening of the restaurant.
Now, I’d been rather dismissive of the ferry’s advertised à la carte restaurant. I mean, an à la carte restaurant? On a car ferry? But then I’d forgotten one rather important detail. It was an Italian ferry. And the food was magnificent. We ordered pasta and pizza, both delicious, but I spent much of the meal watching the fish dishes arriving at neighbouring tables and wishing I’d been a little more adventurous. I’d assumed, quite wrongly, that the fish would be frozen and rather uninspiring. What appeared on those plates was anything but, and I was thoroughly annoyed with myself for not ordering it. Next time, I’ll know better.
Eventually, we retired to our little cabin, where sleep was rather fitful. Every unfamiliar noise seemed magnified and at one point we must have encountered some fairly choppy water, as the ship became noticeably more turbulent. However, I obviously managed to get some sleep because the next thing I remember was the crackling of the tannoy, with announcements in French, Italian and English informing us that we’d soon be arriving in Barcelona.
arriving in barcelona & beginning our spanish adventure
By 9am, we’d disembarked and were navigating our way out of Barcelona, passing the Christopher Columbus monument at the bottom of La Rambla as we began heading south. After everything that had happened over the previous few days – leaving Istria, revisiting Italy, the long drive, the ferry delays and those wonderful dolphins – we were finally in Spain. And somewhere ahead of us was a new home. We didn’t know exactly where it would be, what it would look like or quite how our lives were going to unfold. All we knew was that we were heading towards Andalucía, with a list of houses to view and a completely new chapter of our lives waiting to begin. It was exciting, a little daunting and, after everything we’d experienced on the journey, rather wonderful.
would we take the genoa–barcelona ferry again?
Absolutely, although perhaps with slightly different expectations. The ferry was a welcome alternative to a very long drive and having the opportunity to rest, enjoy a good meal and spend a night away from the road was a definite advantage. The four-hour delay was frustrating, particularly as we’d already checked in and were sitting in the car, but delays can happen with any form of travel.
If we were making the journey again, I’d certainly consider booking an outside cabin. Our internal one was perfectly adequate for sleeping, but if you’re not particularly fond of enclosed spaces, the extra cost might well be worthwhile. I’d also approach the restaurant with rather more confidence. If you’re travelling on an Italian ferry and there’s fish on the menu, don’t make the same mistake I did! And, of course, it’s worth looking carefully at the available routes before booking. We’d completely overlooked the possibility of continuing towards Tangier, although as things turned out, we were very happy to have travelled through Spain from Barcelona.
Our crossing was in July 2024, so the price we paid, departure times and onboard arrangements reflect our experience at that time. If you’re considering the same journey, it’s worth checking current ferry schedules, prices and routes before making plans.
Without hesitation, we’d do it again. Perhaps not the four hours sitting in a sweltering car, and perhaps with a slightly more comfortable cabin, but everything else has become part of a journey we remember with enormous affection. And those dolphins? Well, they were worth the trip alone. Sometimes, the journeys between places turn out to be every bit as memorable as the destinations themselves.
Originally published in 2024. Revised and updated October 2026.
by Helen | Oct 16, 2026 | Lifestyle
Our experience of changing electricity suppliers in Spain – and why a lovely octopus has won us over.
When we moved into our house in Andalucía, we knew there would be things to get used to. Spanish bureaucracy, unfamiliar systems, the occasional language barrier. All part of the adventure. What we hadn’t anticipated was quite how complicated it could be to ask for a little more electricity. Not cheaper electricity. Not free electricity. Just a slightly bigger supply, for which we were perfectly happy to pay.
Apparently, this was quite an ambitious request.
the problem with 4.4 kW
Our house is fairly large, and while we don’t generally have problems with our electricity supply, winter can be a different story. Put the oven on, add a heater, perhaps a kettle, and suddenly everything goes dark. Our contracted power was 4.4 kW. We wanted to increase it to 5.5 kW. Nothing particularly dramatic, and certainly not an unusual request in Spain.
So, we contacted our electricity supplier, Iberdrola. And that was where the adventure really began. Three attempts. Three rejections.
To be fair, our initial dealings with Iberdrola were encouraging. The person we spoke to was helpful, the process sounded straightforward, and we were optimistic. We should perhaps have known better. Our applications were accepted for processing on three separate occasions – in January, March and April 2026 – and subsequently rejected. The reason given was that access to the property had been impossible on more than two occasions. This was particularly puzzling because we work from home and during the week that’s where we generally are – home. Working. It then transpired that the contact telephone numbers held on our account belonged to our solicitor, who had originally set up our contract – but despite requests, Iberdrola had never updated the contact details. So, perhaps calls were made to the solicitor to arrange the visits – she confirmed that no calls or messages had been received.
We eventually had the contact details corrected, but by then we’d spent months trying to arrange something that had initially sounded relatively simple. There were emails, telephone calls, explanations, further enquiries and quite a lot of waiting. And still no increase. We weren’t asking for the moon. Just another 1.1 kW.
enter the octopus…
Eventually, we decided it was time to look elsewhere. We investigated alternative suppliers and came across Octopus Energy España. Now, I appreciate that electricity suppliers aren’t generally the sort of companies that inspire much enthusiasm. Most of us simply want the lights to come on when we flick a switch, preferably without having to think too much about it. But our first dealings with Octopus were refreshingly different. We were put in touch with Paula, who answered our questions clearly, explained the tariff, confirmed the costs and offered to help us through the switching process.
And, perhaps most importantly, she actually responded to our messages. A small thing, you might think. But after our previous experiences, it felt positively revolutionary.
understanding the costs…
We chose the Octopus Relax tariff, which, at the time of our agreement, offered a fixed electricity consumption price of €0.1290 per kWh throughout the day. The contracted-power charge quoted was €0.1200 per kW per day, with no minimum commitment period or unwanted extras.
For us though, the attraction wasn’t simply the price. It was the clarity. We knew what we were agreeing to, what we’d be paying and who to contact if we had a question. Of course, electricity tariffs change, and what’s right for one household won’t necessarily be right for another. It’s always worth comparing the full costs rather than looking at the consumption price alone. But after months of uncertainty, straightforward information was enormously welcome.
and then, something happened…
The switch was effected by Octopus on 8th October. And then, on 15th October, something rather extraordinary happened. Our electricity supply was finally increased from 4.4 kW to 5.5 kW. Nine months after our first application. Three rejected requests, numerous emails, telephone calls and a considerable amount of head-scratching later, we finally had the additional power we’d been requesting since January. And, remarkably, it happened within a week of switching to Octopus. On the very same day (15th October), someone from the electricity distribution company visited our house, checked the fuse box and confirmed everything was in order. and at approximately 5pm, the increase was completed.
We’re not suggesting that changing suppliers magically solves every problem with Spain’s electricity infrastructure. But in our case, the contrast between the two experiences has been quite extraordinary. We asked. We received clear answers. Things progressed. And then they actually happened.
Sometimes, it’s the little things. Even when those little things involve 1,100 watts of electricity.
the customer satisfaction survey…
And just when we thought the story was coming to a close, Iberdrola invited us to explain why we’d left. I began completing their customer satisfaction survey, only to find myself unceremoniously ejected before I’d started the second screen, just as I was was about to explain why I had left Iberdrola. A field I was looking forward to completing…
When I attempted to return, I was informed that I’d already submitted my answers. I hadn’t. After nine months of trying to get something done, it seemed rather fitting that I couldn’t even successfully tell them why we’d given up.
But I wasn’t going to let a malfunctioning questionnaire have the last word. So I sent an email instead. A rather comprehensive one. I don’t imagine it will be appearing in their next collection of glowing customer testimonials.
it’s not just about electricity, though…
There’s something rather telling about the whole experience. We’re not unreasonable customers. We understand that things go wrong, processes can be complicated and not everything is within a supplier’s control. What matters is how those situations are handled. We don’t expect miracles. We do expect communication, clear explanations and some indication that someone is taking responsibility for helping us find a solution. When Iberdrola asked how likely we were to recommend them, I gave them 0/10. Not because of one unsuccessful application, but because of the cumulative experience over several months. By contrast, our dealings with Octopus have been friendly, efficient and refreshingly human.
We haven’t yet received our first bill, so we’ll reserve judgement on that particular part of the experience. And, as with any new supplier, we’ll see how things develop over time. But so far? We’re happy. This winter, we’re looking forward to the rather novel experience of using the oven, kettle and heater without plunging the house into darkness. We never imagined we’d get quite so excited about electricity.
But here we are. Rather taken with an octopus…
This is an independent account of our own experience of changing electricity suppliers in Spain. We have no commercial relationship with Octopus Energy or Iberdrola, and the tariff details quoted were those provided to us when we arranged our switch.
by Helen | Oct 15, 2026 | Renovation
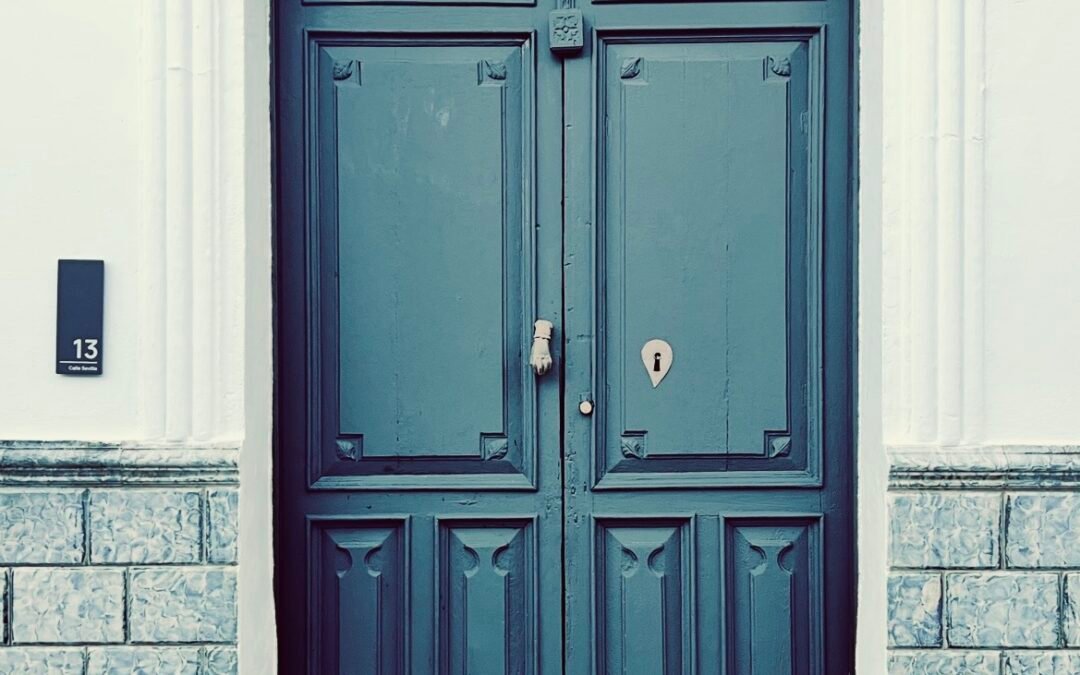
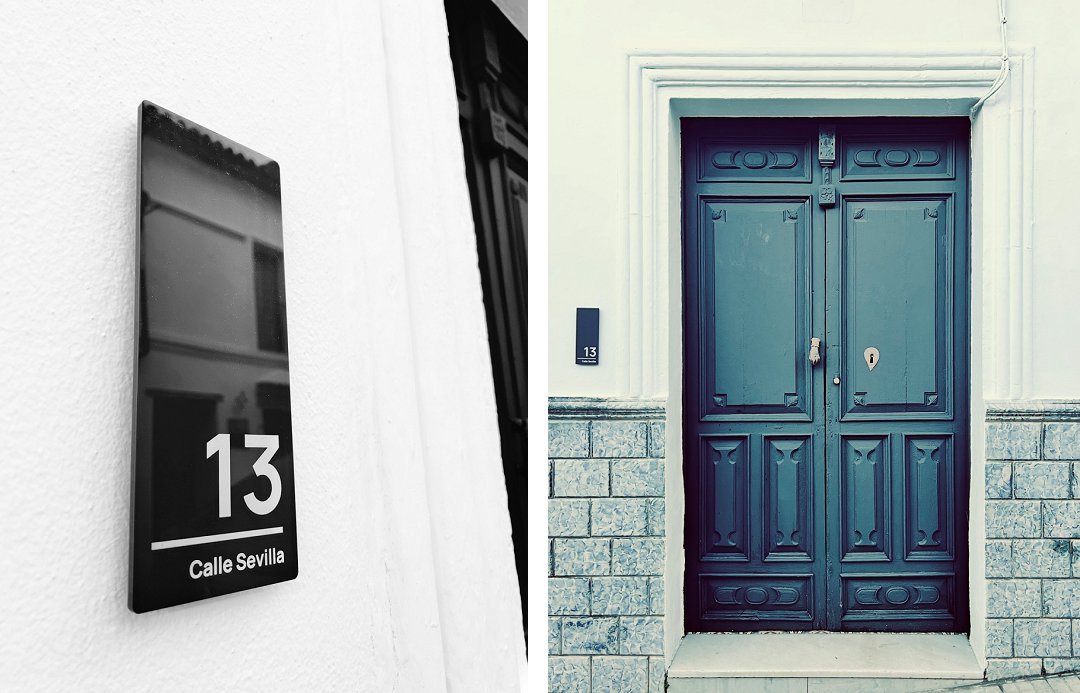
…deserve a post of their very own. They are now the most beautiful doors, but it’s taken a real labour of love, because when we bought the house, they definitely weren’t beautiful. In fact, they looked so awful and dilapidated that the intention was to have them re-made.
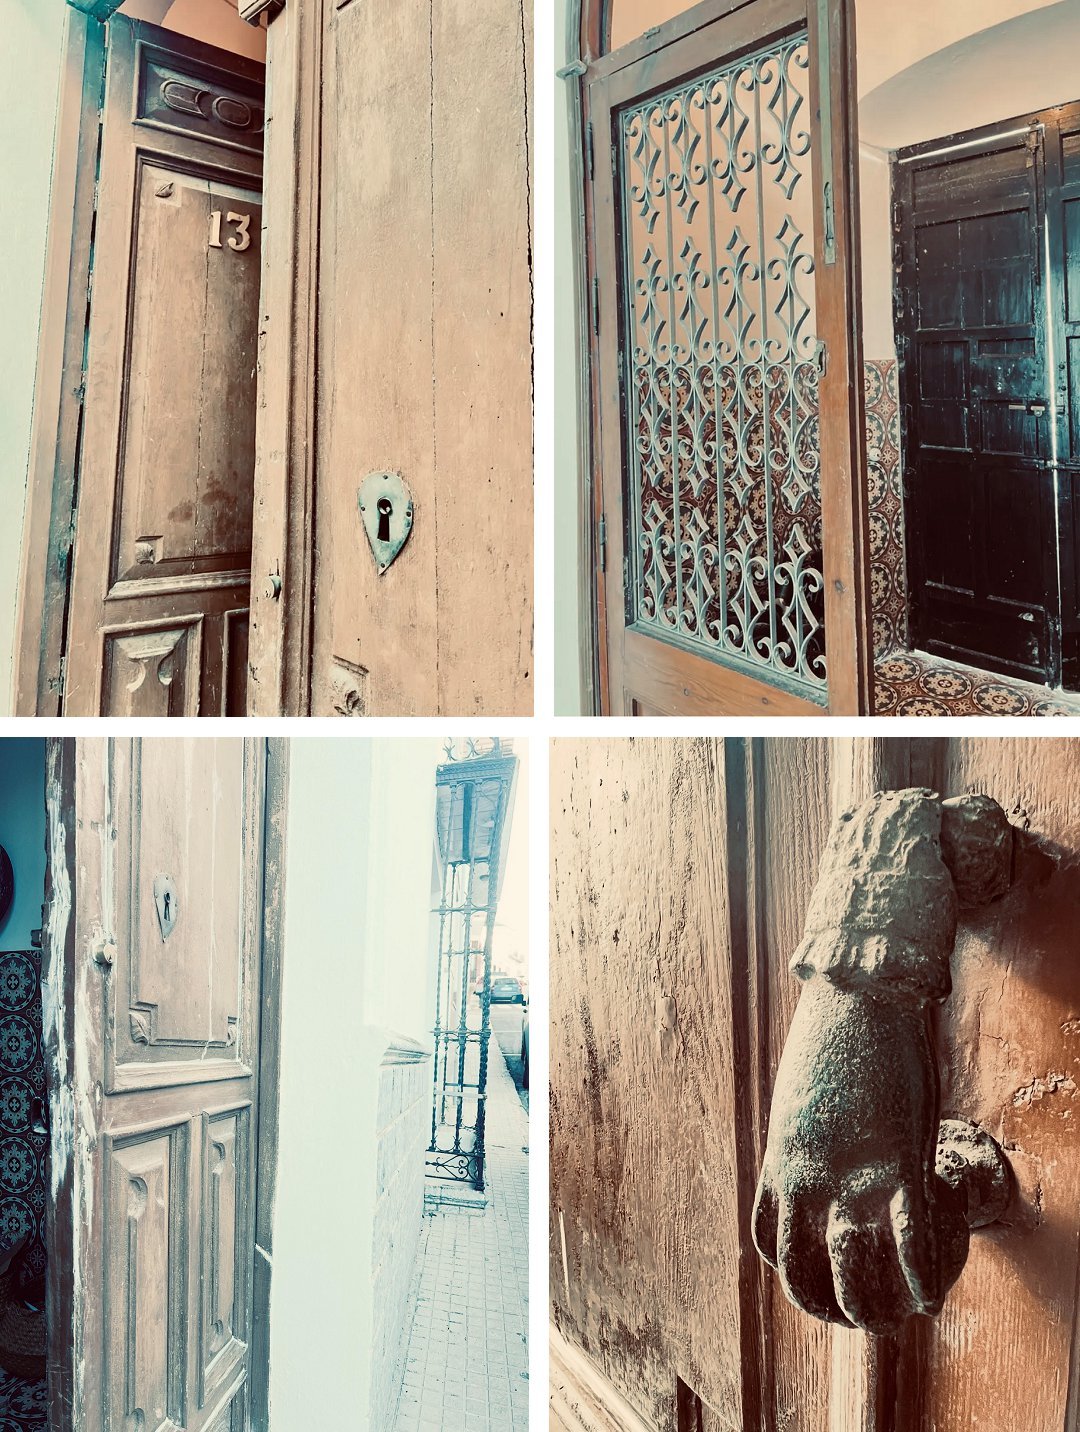
It was obvious that in their prime, they had been very elegant and exquisitely crafted. I say “they” because they are actually double doors, creating a very grand entrance to our townhouse. But by the time we bought it, they had been very neglected. They’d been painted in a very muddy brown colour on the outside, which had faded and just looked like sludge. They were cracked in places. Parts of the carved decorative motifs were missing. The old door furniture had been allowed to rust and a new lock system had been installed, and looked so out of place. All in all, they were horrible, and definitely not what we wanted for the entrance to our home, but as the house was being renovated and every day more building materials arrived, they weren’t a priority. Until we actually moved in.
It had always been in our heads that the woodwork in the house, including the front door, would be a soft sage green. But once the crittal doors and windows, around the internal courtyard were installed, we started to think about matte black for the external doors and windows. A bit of a departure from our original thoughts, but we loved the black metal work and didn’t really think any other colour would work on the new windows looking down into the courtyard, and this then led us to wonder if black would work on the front door and the windows and shutters at the front of the house. And, the closer we looked at the front doors, the more we realised that with a bit of elbow grease, we maybe wouldn’t need to replace them after all. There were just too many components we loved about them, that we wouldn’t be able to faithfully replicate with new doors. The bolts were just amazing, especially the main horizontal bolt to lock the doors. Like something you’d find on a castle door! And, as the inside of the doors were already a very dark brown, almost black colour, we had a feeling it could work, but there was only one way to find out, as we started repairing and painting them…
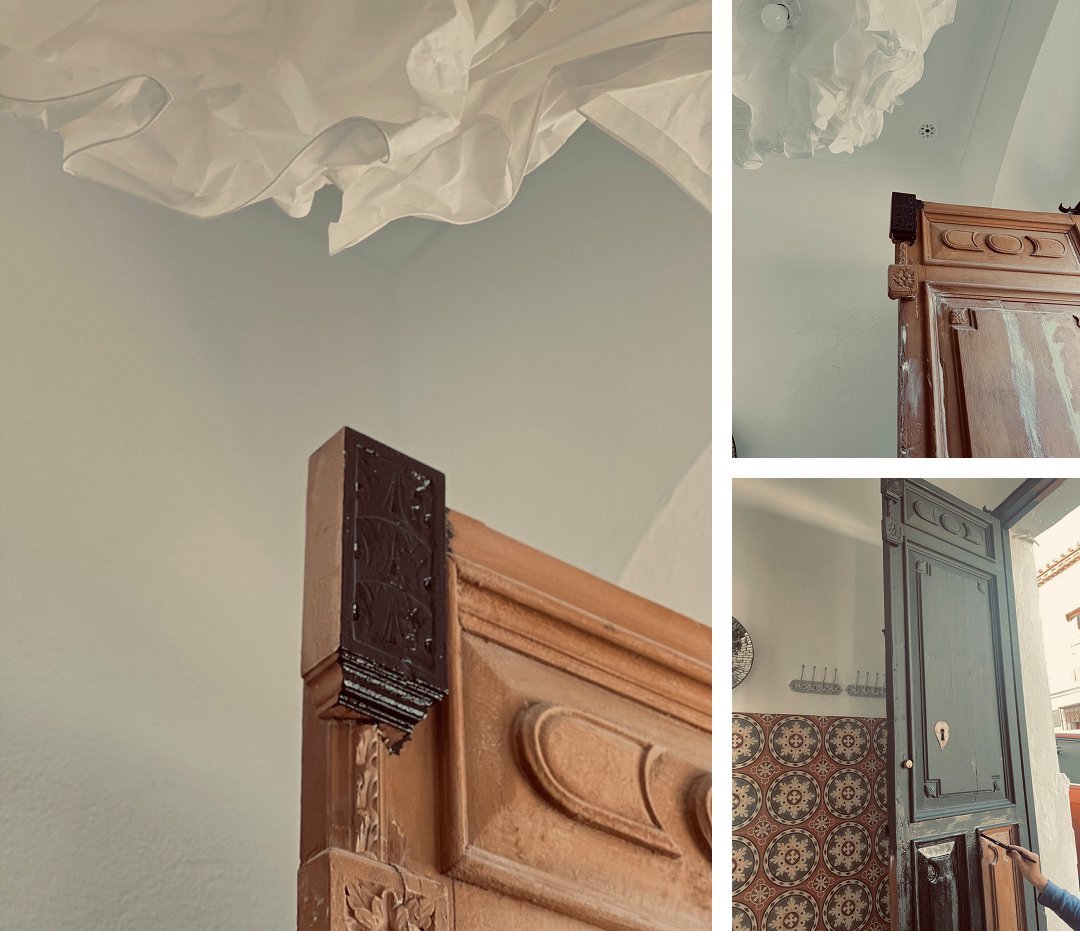
With all of the builders clutter cleared, the new wall and floor tiles installed, the internal doors painted white and a new light shade fitted, we immediately felt that going black was going to be right. The space and the doors were big enough to go bold, and there was no going back. And we knew we definitely needed to keep that beautiful Hand of Fatima door knocker. We opted for a matte paint, as we felt that anything with a shine might be a bit too Downing Street, and that was definitely not the look we were hoping for!
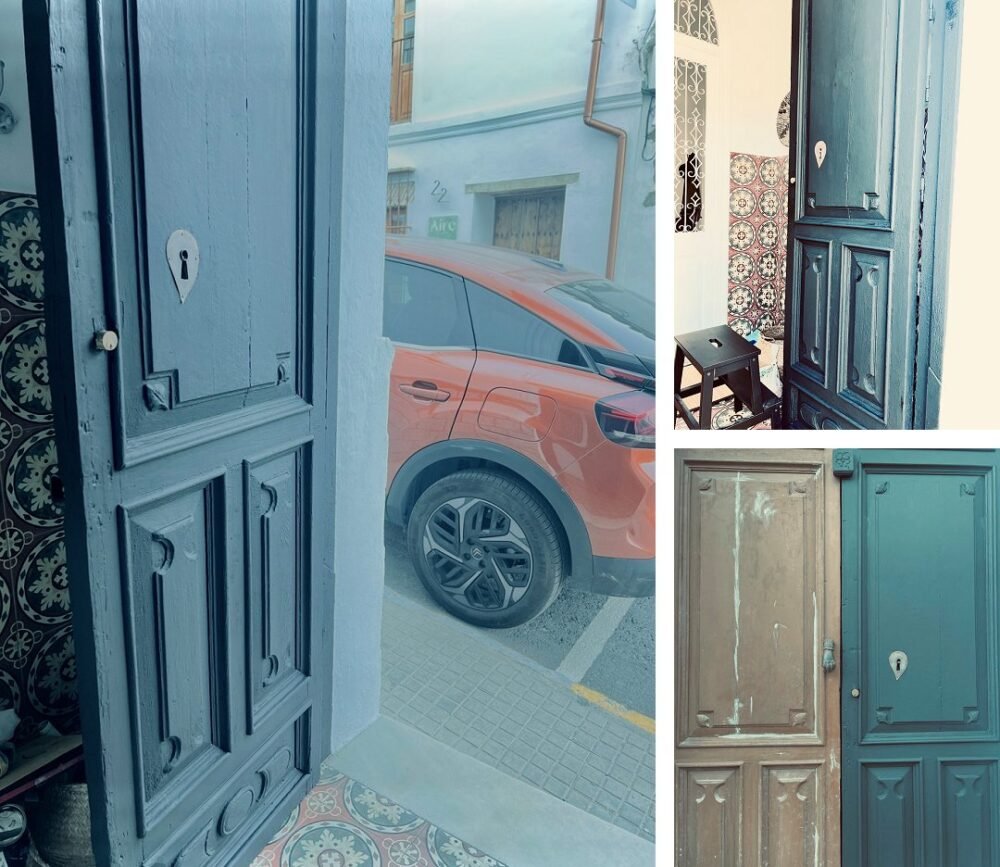
With a new house sign, we think our new/old doors are absolutely perfect. They still have signs of their age, which we love, because they have history and even if new doors were made to replicate these, they wouldn’t be quite the same. So, as well as saving a small fortune, we’ve retained an original feature, and having given it a bit of TLC, we’ve hopefully extended the life of these gorgeously elegant doors. Just need to do something about those awful wall tiles now…
by Helen | Oct 15, 2026 | Interiors
Sometimes, it’s the smallest details that make a house feel like yours.
When we began renovating our old Andalucian townhouse, there were certain things we knew we wanted to retain, certain things we wanted to change, and a few things we simply weren’t prepared to compromise on. Light switches were one of them.
I’ve always loved traditional toggle switches. There’s something about their simplicity, their shape, the way they feel beneath your fingers. And in a house with so much history and character, ordinary white plastic switches just didn’t feel right. The house deserved something better.
I discovered Fontini while looking at different options online, and that was pretty much that.
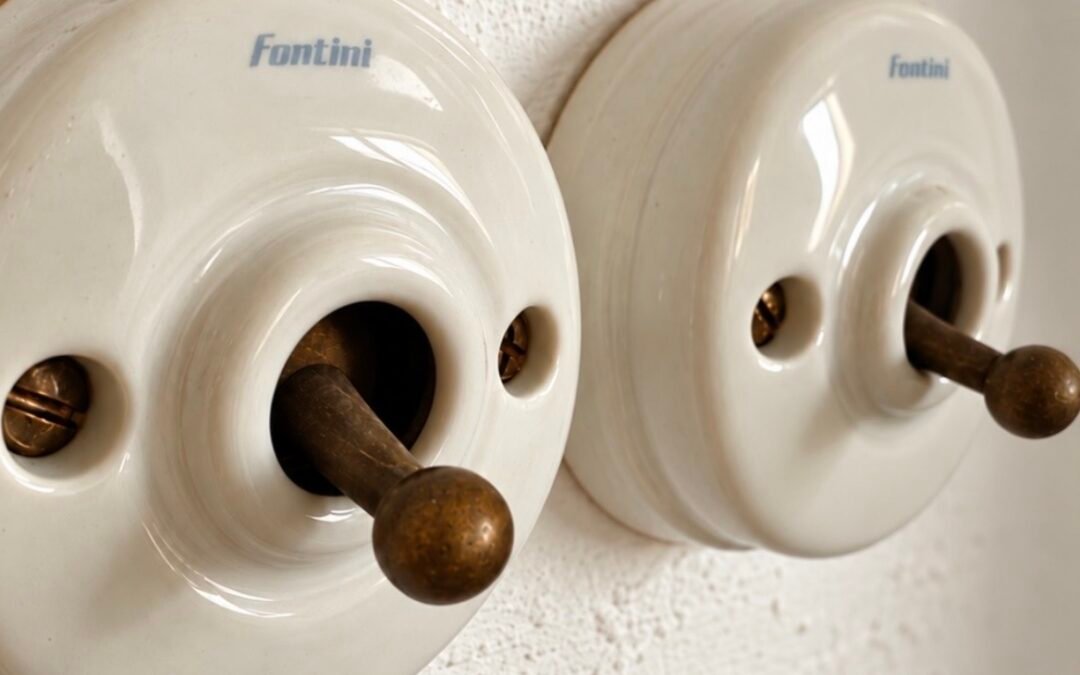
There were plenty of designs to choose from, but I kept coming back to the simplest. White ceramic, a brass toggle and the most beautiful, delicate pale-blue Fontini logo. Unfussy. Uncomplicated. Just beautiful. They weren’t inexpensive, particularly when you start counting how many switches a house actually needs. And ours needed quite a lot. Initially, we’d planned to have them fitted on the ground floor only. But after finding them through a Spanish electrical supplier at a better price, we decided to go a little further and use them throughout the house. I’m so pleased we did.
They’re lovely to look at, of course, but what I hadn’t fully appreciated was how tactile they would be. There’s a satisfying little clunk when you move the brass toggle. Nothing harsh or mechanical. Just a reassuring, deliberate movement. A tiny everyday pleasure. And when you think about how many times you turn a light on or off, those tiny pleasures add up.
Of course, this being a renovation, things didn’t go entirely to plan.
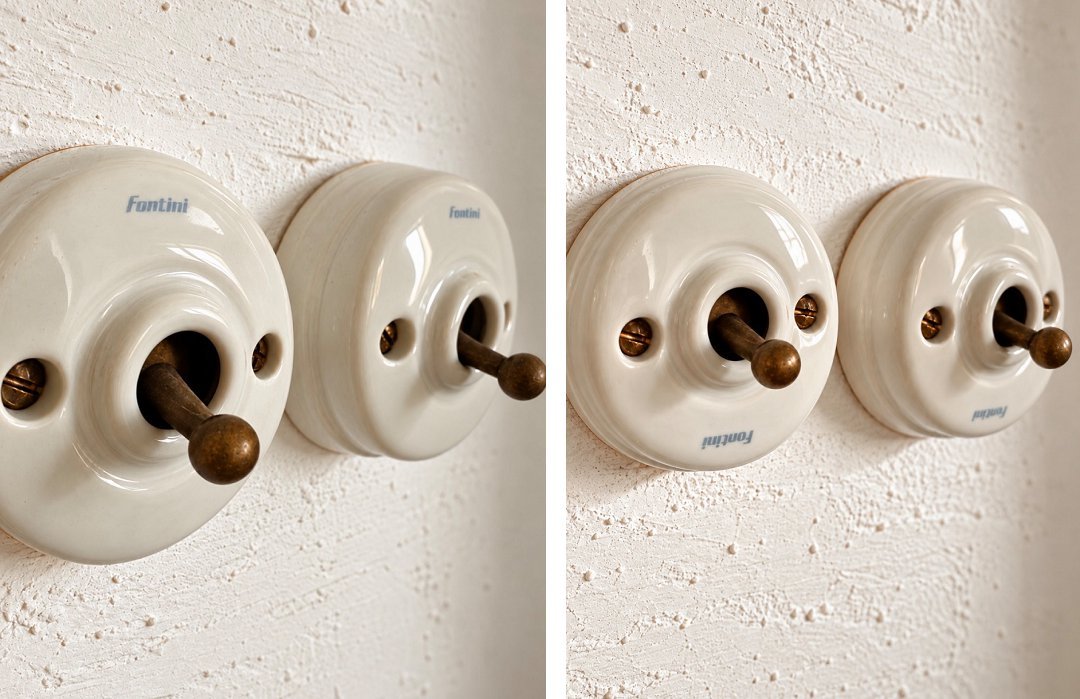
Some months after the switches had been fitted, I noticed that nine of them had their beautiful pale-blue Fontini logos upside down. Initially, I assumed the ceramic covers had simply been installed the wrong way round. Something we could easily put right. Except we couldn’t. When we removed one of the covers, we discovered a small channel cut into the ceramic. Turning the cover around would put the logo the right way up, but leave the channel clearly visible at the top. A little investigation, followed by an exchange of emails with the supplier, revealed the explanation.
I’d ordered the wrong switches…
Not entirely wrong, thankfully. They worked perfectly well. But I’d inadvertently ordered a version designed to accommodate surface-mounted electrical cables, complete with a little opening for the cable to pass through.We didn’t have surface-mounted cables. And the only way to conceal the opening was to fit the ceramic covers upside down. The supplier confirmed that replacement covers weren’t available separately. Putting things right would mean purchasing nine complete switches. By that stage of the renovation, we simply couldn’t justify the additional expense. Not for something that worked perfectly well and looked beautiful in every other respect. So we left them.
And I’m still delighted with our choice. The switches are exactly what I’d imagined for the house, and I’d choose them again without hesitation. Although I’d pay rather more attention to the product references next time, as nine of our switches still have their little pale-blue logos upside down.
Nobody else has ever noticed. But I notice every single time. Perfect imperfection…

by Helen | Oct 10, 2026 | Lifestyle
Meet Henry, Donette and Nettie. Three very different members of the household, each with a job to do.
There are now three vacuum cleaners living in our Andalucian house. Two of them are robots. The third has been with us for so long that he’s practically family. We appreciate that three hoovers might sound a little excessive. But there’s a method to what might initially appear to be madness. And, as with most things in this house, there’s a story behind it…
a house with a lot of floor…
Our house is old, rather large and not particularly interested in conforming to modern expectations of level surfaces. At almost 300 square metres, spread over two floors with a roof terrace above, there’s a considerable amount of floor to keep clean. Downstairs, we have relatively smooth, newly laid tiles. Upstairs, the original floors are considerably less predictable, with uneven surfaces, rugs and the occasional obstacle.
We’d been considering a robot vacuum cleaner for some time. The idea of something quietly taking care of the everyday dust and debris while we got on with other things was enormously appealing. But we soon found ourselves contemplating not one robot, but two. Extravagant? Possibly. Practical? We thought so.
Our reasoning was fairly straightforward. These are clever little machines, with their own mapping systems, charging stations and cleaning routines. We didn’t particularly fancy unplugging everything and carrying a robot up and down the stairs every time we wanted another floor cleaned. And with so much ground to cover, we wondered whether dividing the workload between two machines might eventually prove kinder to both of them than expecting one to do everything.
Time will tell whether that theory holds up. But the convenience was persuasive enough.
donette arrives…
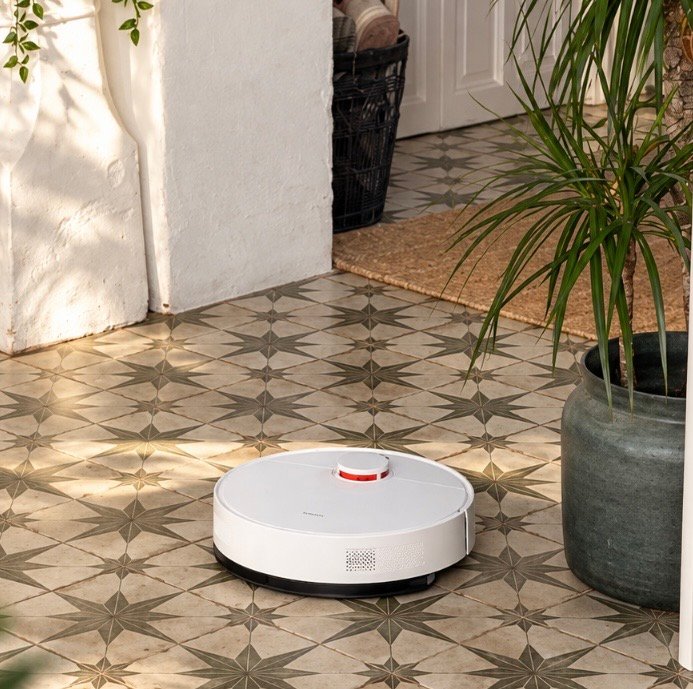
Donette was our first. A Xiaomi S40C, she arrived with considerable expectations attached. We’d imagined a beautifully efficient little machine quietly navigating the upstairs rooms, vacuuming and mopping while we congratulated ourselves on our excellent decision. And, to be fair, much of that happened.
But Donette also introduced us to the peculiarities of robot ownership.
Her mopping system initially caused problems, with airlocks preventing the water from flowing properly. There were investigations, experiments and a period during which she was very firmly on the naughty step. Returning her was seriously considered. Eventually, we worked out what was happening, resolved the problem and gave her another chance. She’s been making up for lost time ever since.
However, she’s also discovered that some things are beyond even her abilities. The shag-pile rugs in our Seventies Room, for example, proved rather too ambitious. Those are now left to someone with considerably more experience. More about him shortly…
and then came Nettie…
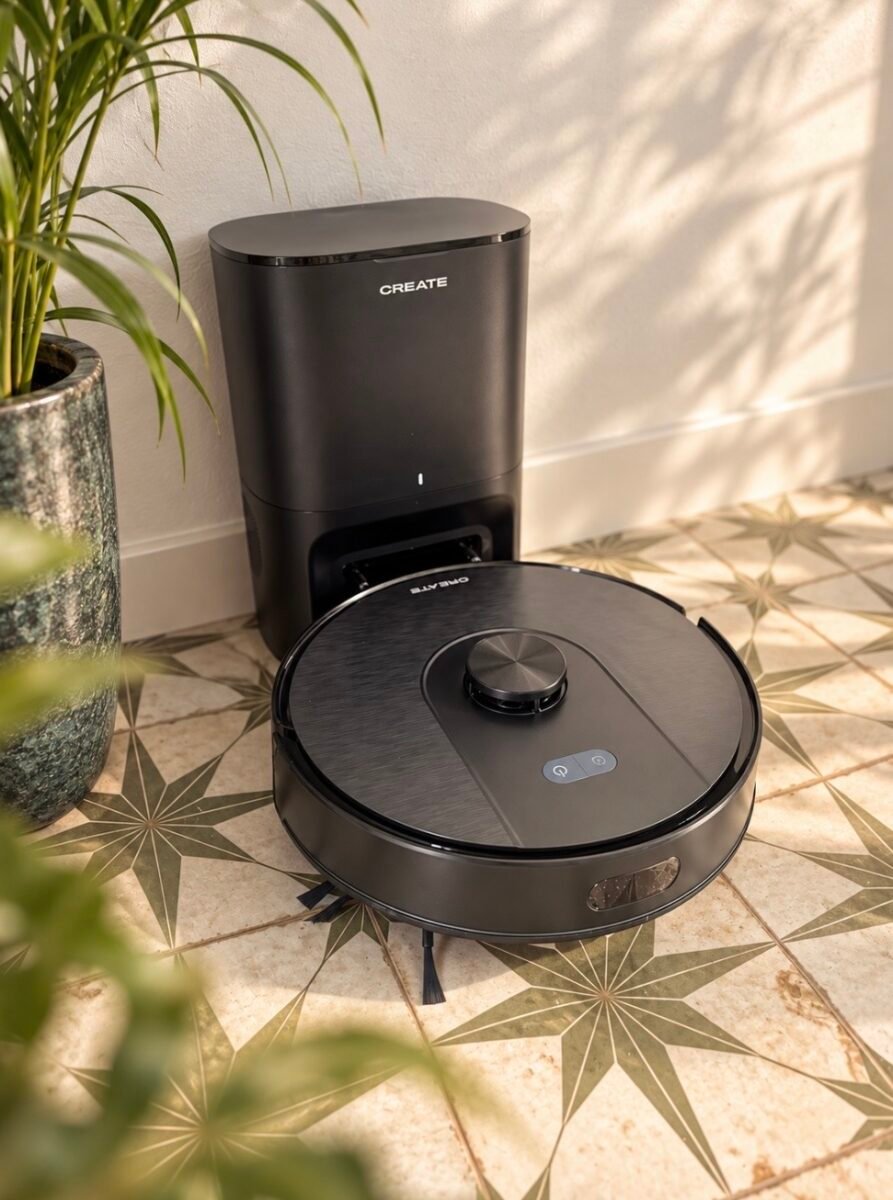
With Donette settling into her responsibilities upstairs, we introduced Nettie to the ground floor. Nettie is a Create Netbot LS50, and she has a slightly different approach to life. For one thing, she empties herself.
We knew, in theory, that her docking station would automatically remove the collected dust. What we hadn’t quite anticipated was the noise. The first time she returned to her dock and emptied her dustbin, it sounded as though a small jet engine had started up in the house. Five seconds later, silence. Efficient, certainly. Subtle, perhaps less so.
Nettie has the advantage of working on our relatively flat downstairs tiles, while Donette negotiates the more challenging terrain upstairs. Both vacuum and mop, and both have already proved enormously useful.
If pushed to declare a favourite, we might lean ever so slightly towards Donette. Not because she’s necessarily better. Simply because she was our first. We suspect parents of more than one child may recognise the sentiment, although we’re saying absolutely nothing about that.
two robots. one decision…
We’re not suggesting that every household needs two robot vacuum cleaners. For a smaller home, one would almost certainly be sufficient. And even in a larger house, there are other ways of managing the cleaning. But for us, having one machine permanently based on each floor has made sense.
They each have their own charging station, their own mapped territory and their own responsibilities. There’s no carrying equipment up and down stairs, no relocating docks and no asking one machine to tackle the entire house. We also hope that sharing the workload might reduce wear over time, although it’s far too early to know whether that will prove true. What we do know is that both have earned their place.
And despite the occasional technical hiccup, we’re delighted with them.
but what about henry?
Ah, Henry. Long before Donette and Nettie arrived, there was Henry. He’s been with us since our West Didsbury days, travelled with us to Istria and eventually made the journey to Andalucía. He’s seen houses, renovations, building dust and more changes of scenery than most vacuum cleaners could reasonably expect. He has no app. No mapping technology. No automatic charging station. And certainly no self-emptying system that sounds like an aircraft preparing for take-off.
What he does have is experience. And, importantly, the ability to deal with things that his younger colleagues can’t. Those shag-pile rugs upstairs? Henry’s department. The more awkward cleaning jobs? Henry again.
So while Donette and Nettie have taken over much of the everyday floor maintenance, Henry isn’t going anywhere. There’s room for everyone.
a few months from now…
We’re still relatively new to living with robot vacuum cleaners, and there’s plenty more to discover. We’ll be interested to see how they cope with regular use, how much maintenance they need and whether our decision to buy two continues to make sense. We’ll report back once they’ve had a few more months to settle into their routines. In the meantime, there’s a big introduction still to be made.
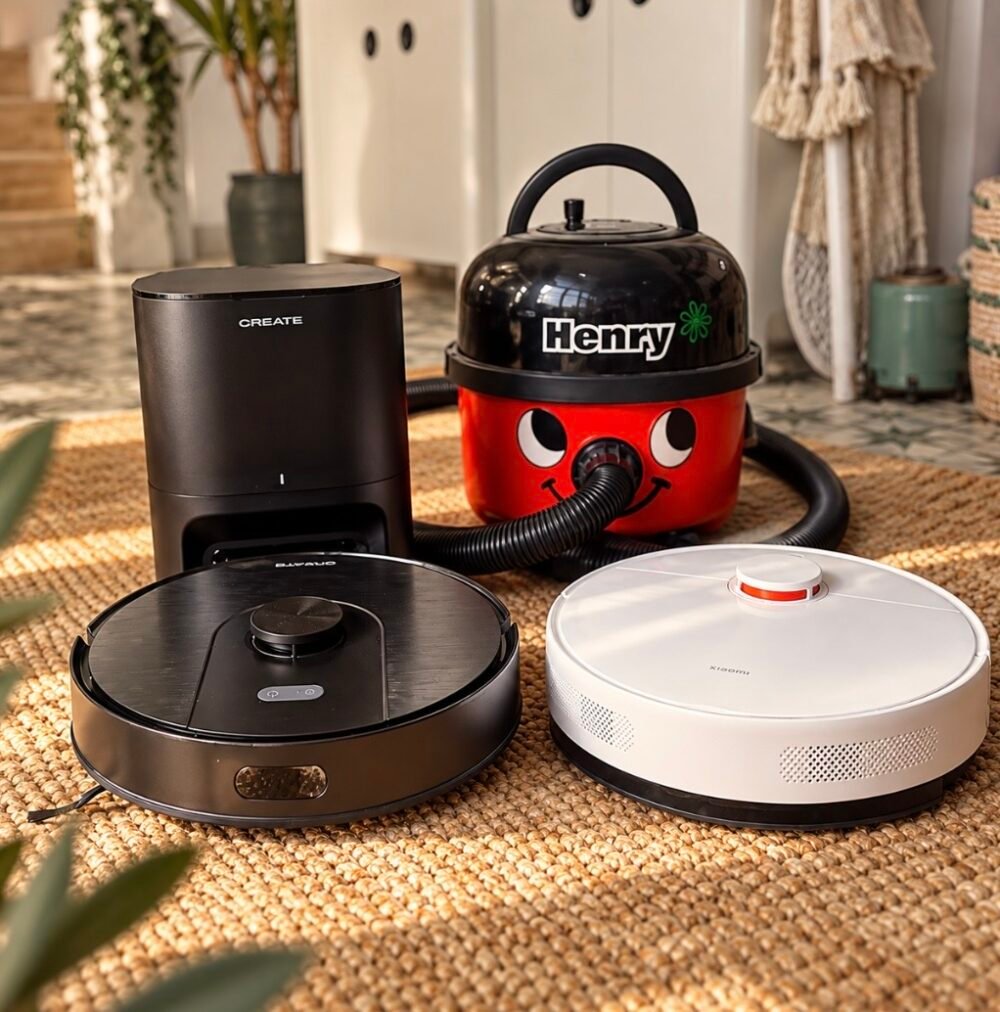
We’ve deliberately kept Donette and Nettie apart so far. But we think it’s time for a family photograph. Henry will, naturally, take centre stage.
Henry. Donette. Nettie. Nobody’s being made redundant.
by Helen | Sep 3, 2026 | Interiors
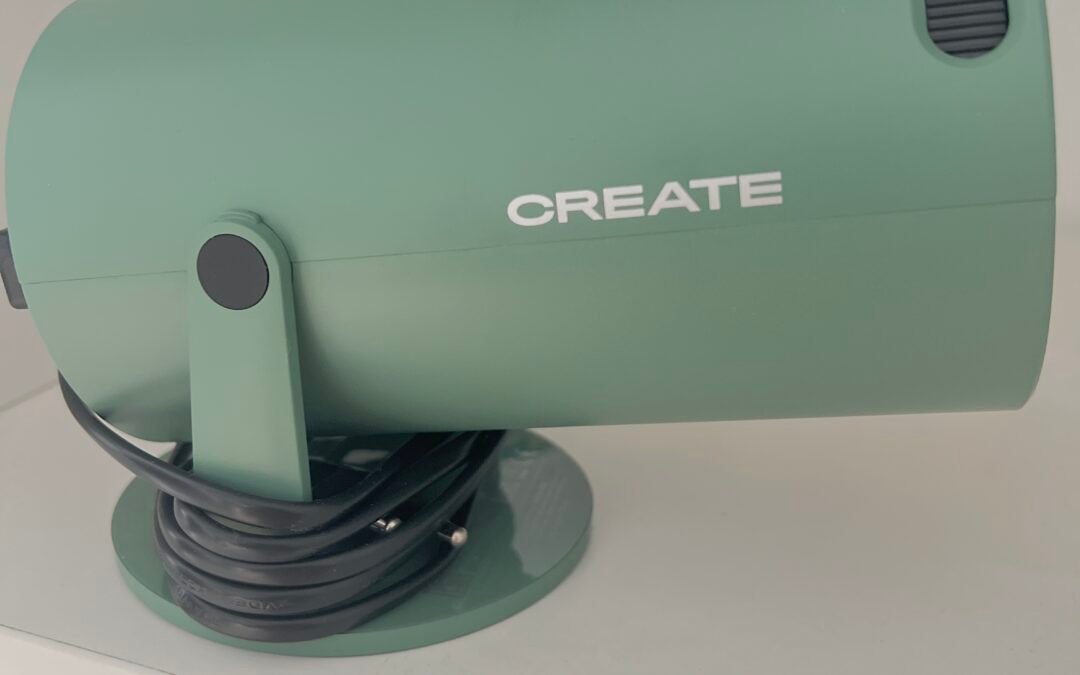
There’s something very satisfying about a piece of tech that works well and looks good enough to leave on display. This compact projector from CREATE (create-store.com) manages to do both — and at a surprisingly accessible price point.
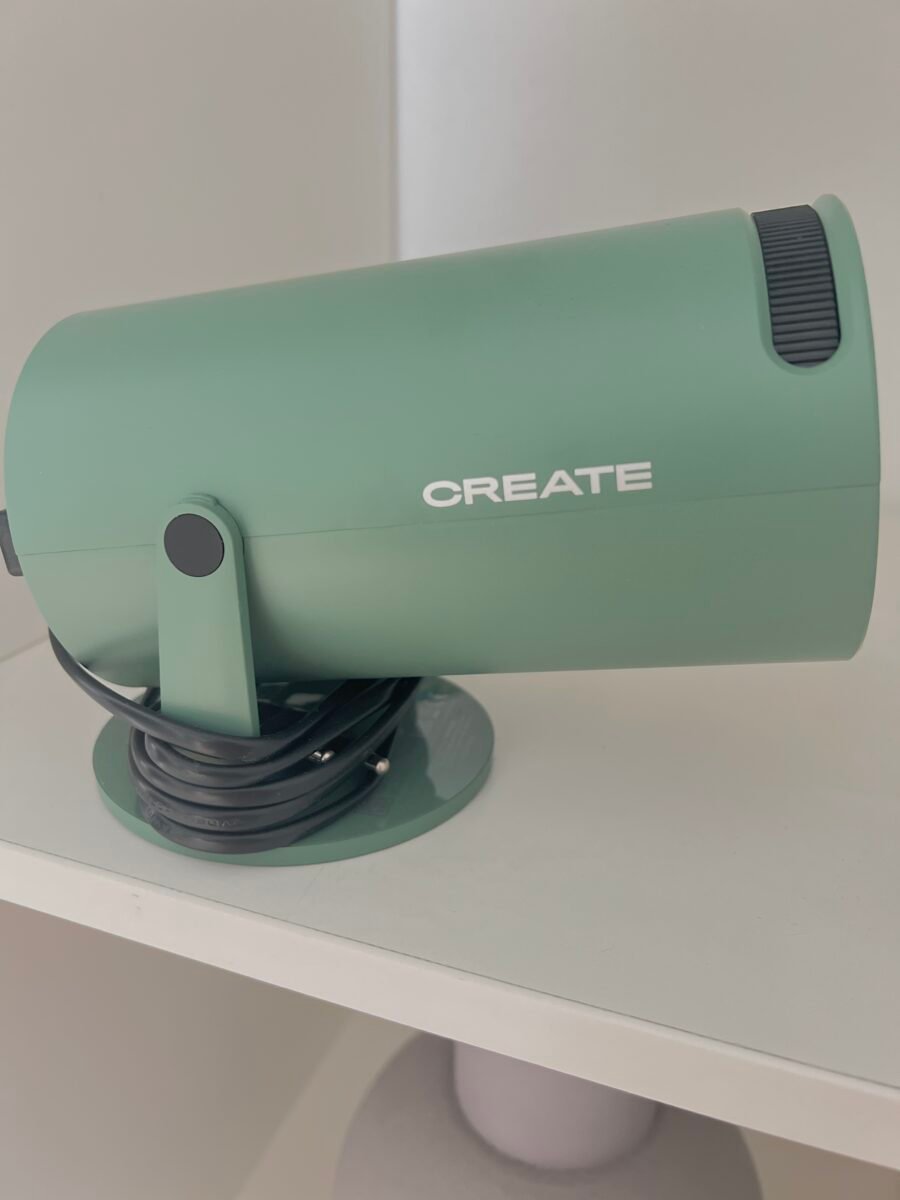
I was initially drawn to the design. With its clean, contemporary shape and soft sage green colour – matching our Create winter heaters – it feels much more like a considered piece of home décor than a traditional projector. It sits happily on a bookshelf when not in use, without becoming an eyesore, and its compact size makes it easy to move from room to room.
designed to fit around you
One of my favourite features is the 180° rotating design. Rather than having to find exactly the right stack of books, table or stand to position the image, you can simply tilt the projector to where you want it. Wall, screen or even ceiling — the flexibility makes it incredibly practical, particularly in smaller spaces.
It’s also genuinely portable. You can move it between the bedroom and living room, take it away for a weekend, or pack it up when you don’t need it. The ergonomic design makes the whole experience feel refreshingly uncomplicated.
easy connectivity
Setting it up was pleasantly straightforward. With Wi-Fi and Bluetooth connectivity, it feels designed for the way we actually consume entertainment now, without needing a complicated collection of cables and equipment.
For something so compact, it offers a lot of versatility. We now have movie nights, curled up in the courtyard. We’ve been streaming the Ripley Netflix series, which is just even better when projected onto a wall outside, under the stars. It has very quickly becomes one of those gadgets you find more uses for than you originally expected.
style without the premium price
What really stands out for me is the value for money. Projectors can easily become an expensive purchase, particularly once you start looking for something attractive and user-friendly. This one combines a stylish aesthetic, useful connectivity, portability and that clever 180° rotation without feeling like an extravagant investment. And unlike a lot of tech, I don’t feel the need to hide it away when I’m not using it. In fact, it looks rather good sitting amongst the books.
the verdict
If you’ve been tempted by the idea of a home projector but don’t want something bulky, overly technical or prohibitively expensive, this little CREATE projector is well worth a look. Although, it is worth bearing in mind if you are tempted and decided to purchase from Create, because they are based in the EU, you will have to pay charges on delivery. Brexit, eh? I have seen UK companies selling similar, but none quite as beautiful in sage green…
Stylish, portable, easy to set up and surprisingly versatile, it’s a great-value way to bring a little big-screen magic into your home.
by Helen | Sep 1, 2026 | Lifestyle
There are certain things you expect to find outside your front door in an Andalusian village. A neighbour stopping for a chat. A delivery van attempting the seemingly impossible task of squeezing along a narrow street. Perhaps a procession, a horse or two, or the distant sound of flamenco drifting up from the square. What you don’t necessarily expect is a man in swimming trunks carrying an enormous inflatable tyre past your window.
But this was Feria weekend in Jimena de la Frontera, and apparently anything goes.
four days when the village changes gear
Our annual Feria is one of those occasions when normal life in Jimena is temporarily suspended. For four days there is music, dancing, flamenco, bands and processions. The square becomes the centre of village life and people who might ordinarily be heading home for dinner somehow find themselves still outside several hours later. It’s noisy, colourful, sociable and wonderfully Spanish.
And then Saturday afternoon arrives…
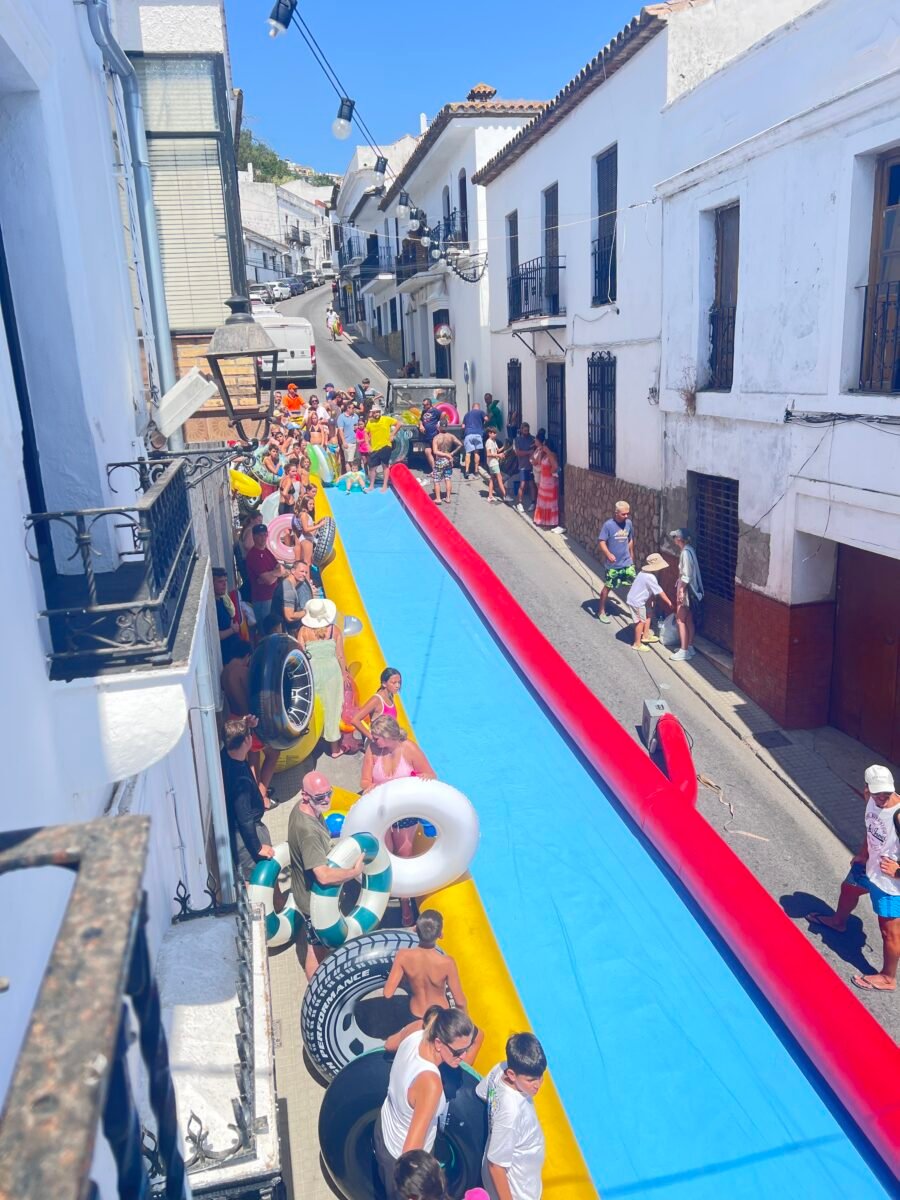
Someone had decided that what Calle Sevilla — the steep street running directly past our house — really needed was a giant waterslide. Not a children’s paddling pool. Not a modest inflatable. A proper, enormous, street-length waterslide.
first, find your inflatable
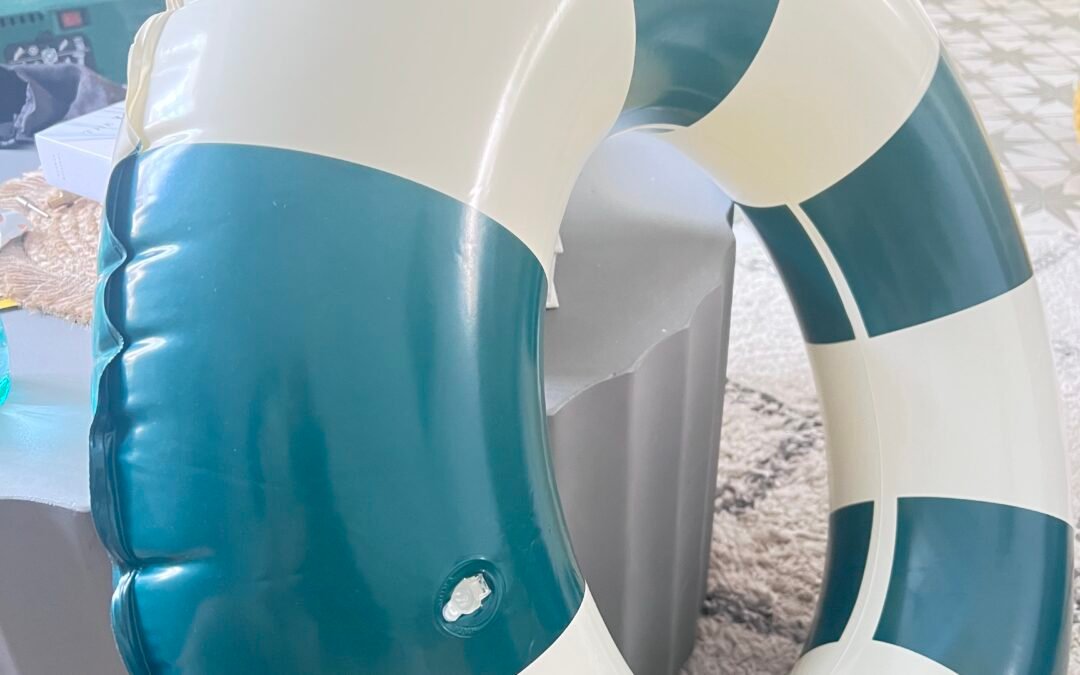
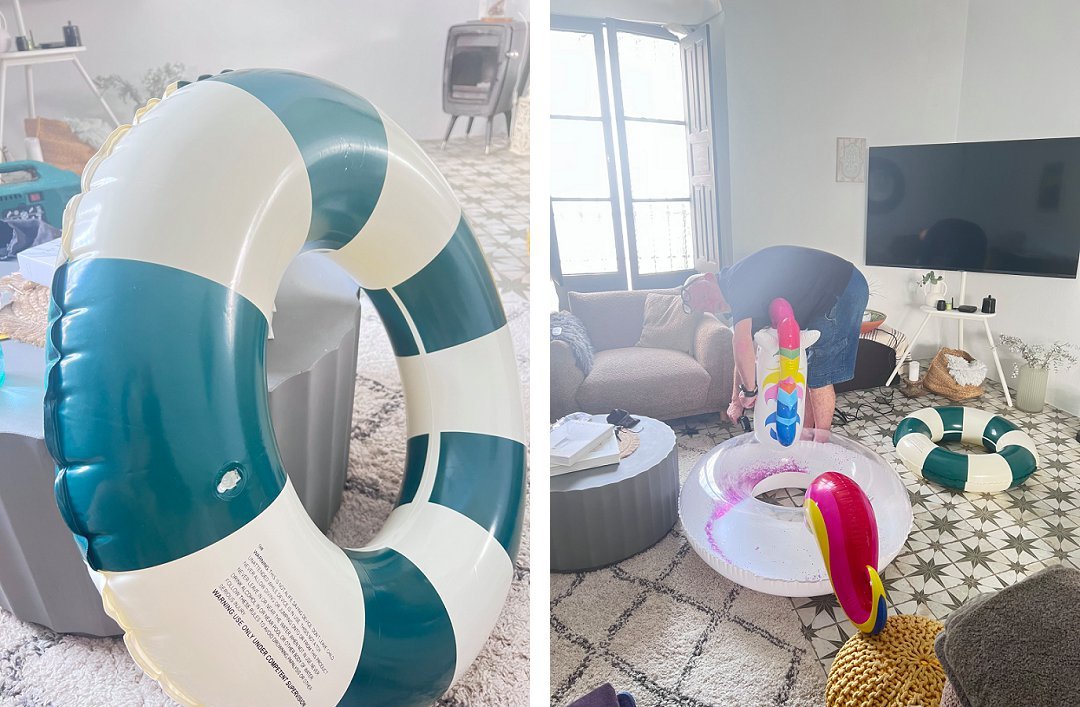
Preparations began at home. Out came the swimming costumes, along with an assortment of inflatables, pumped up and ready for their moment of glory. Our beautiful vintage style green and cream ring, along with a pink, glitter filled unicorn, courtesy of a visiting guest, sat ready and waiting in our living room. Outside, more inflatables, some carried at head past our window. Then we opened the front door. And discovered half the village snaking up Calle Sevilla, past our house. And a giant, inflatable waterslide running down the middle of the road.
calle sevilla, but not as we know it…
The transformation was extraordinary. Where there would normally be cars and people making their way up and down the hill, there was now a brilliant blue river of plastic stretching along the street, edged in red and yellow. And beside it, an ever growing queue. Children, teenagers, parents and grandparents. People in trunks, bikinis and swimming costumes standing outside whitewashed village houses clutching inflatable rings, tyres, lilos and anything else they thought might get them to the bottom faster. All directly outside our front door.
There is something particularly surreal about opening your door onto a familiar street and finding a woman in a bikini waiting patiently with a giant rubber ring. But within minutes it all seemed completely normal.
and they’re off…
One by one, people launched themselves down Calle Sevilla.
Some approached proceedings with considerable confidence. Others discovered, rather too late, that steering an inflatable at speed is not an exact science. There were elegant descents. There were spectacularly inelegant descents. There were collisions, spins, shrieks, enormous splashes and the occasional expression suggesting that somebody had just reconsidered all the decisions that had brought them to this particular moment. And then they’d pick themselves up and join the queue to do it again.
Looking down from above, the sight was quite extraordinary: a huge ribbon of blue running between Jimena’s old white houses, with a procession of people and inflatables stretching along either side. It looked less like Calle Sevilla and more like a temporary water park that had accidentally landed in the middle of an Andalusian pueblo.
and this is why we love village life…
Perhaps that’s the thing about living somewhere like Jimena. The architecture may be old. Traditions run deep. Feria itself belongs to generations of celebrations that came long before us. But tradition here doesn’t necessarily mean taking yourself too seriously.
There can be flamenco and processions. There can be music in the square until late at night. And apparently there can also be several hundred people wandering past your house in swimwear carrying inflatable doughnuts.
For one hot Saturday afternoon, one of Jimena’s streets stopped being a street altogether. It became a playground.
People laughed. Children raced each other. Adults behaved like children. Neighbours stood in doorways watching the spectacle and the whole thing had that slightly chaotic, spontaneous feeling that the best village celebrations somehow manage to create.
By the following day, Calle Sevilla would start becoming Calle Sevilla again.
The water would disappear. The enormous inflatable rings would be deflated and returned to cupboards. Eventually the Feria music would stop and normal village life would resume. But for a few wonderfully ridiculous hours, we had a waterslide outside our front door.
And really, how often can you say that?